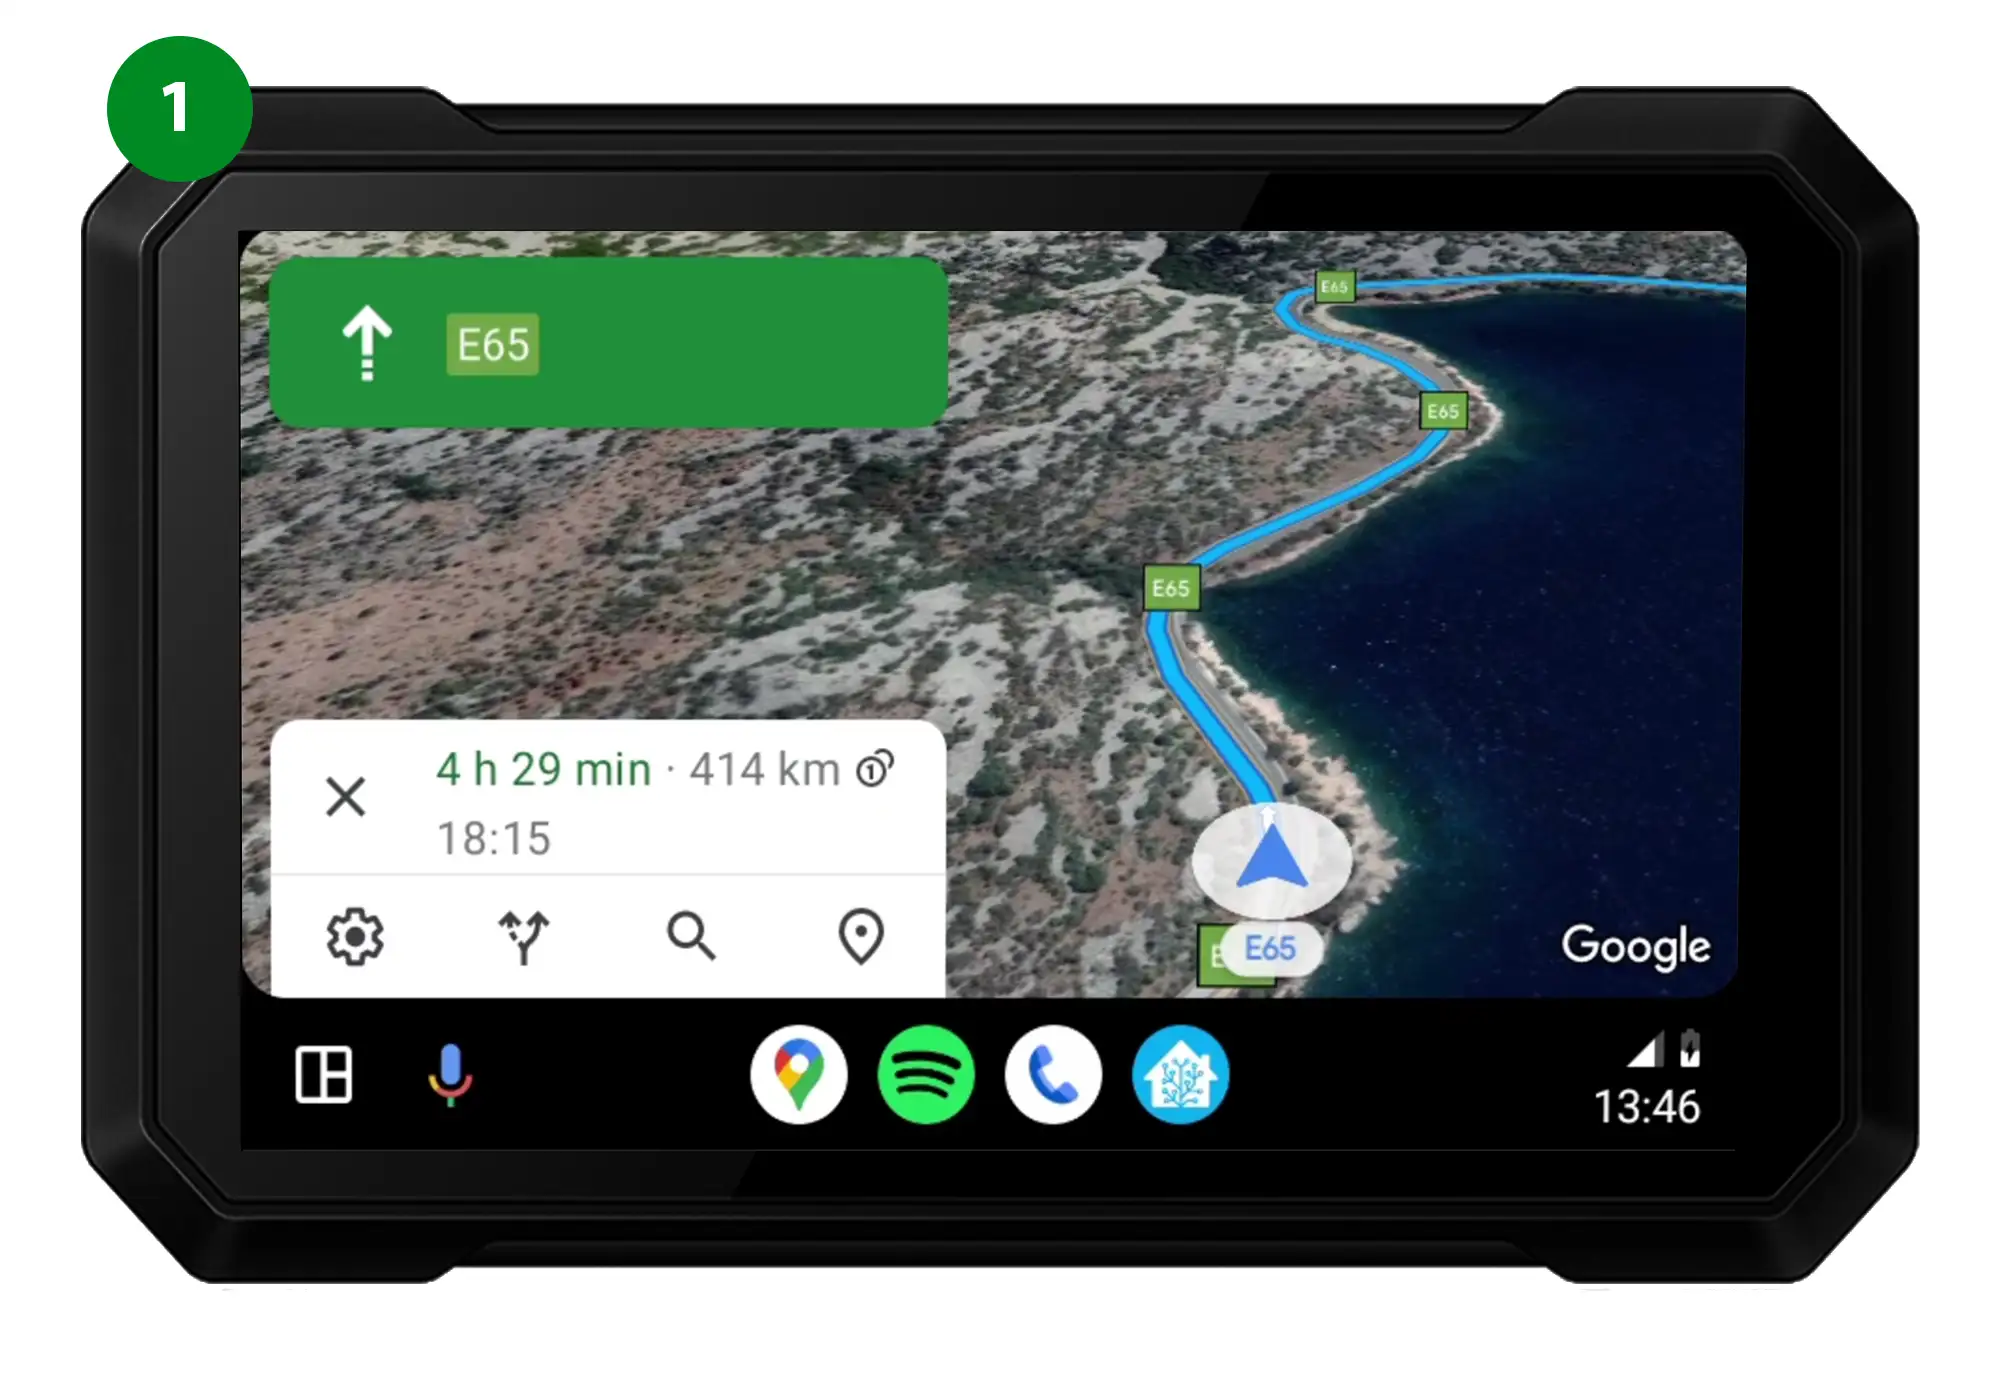
USER MANUAL
What's in the box
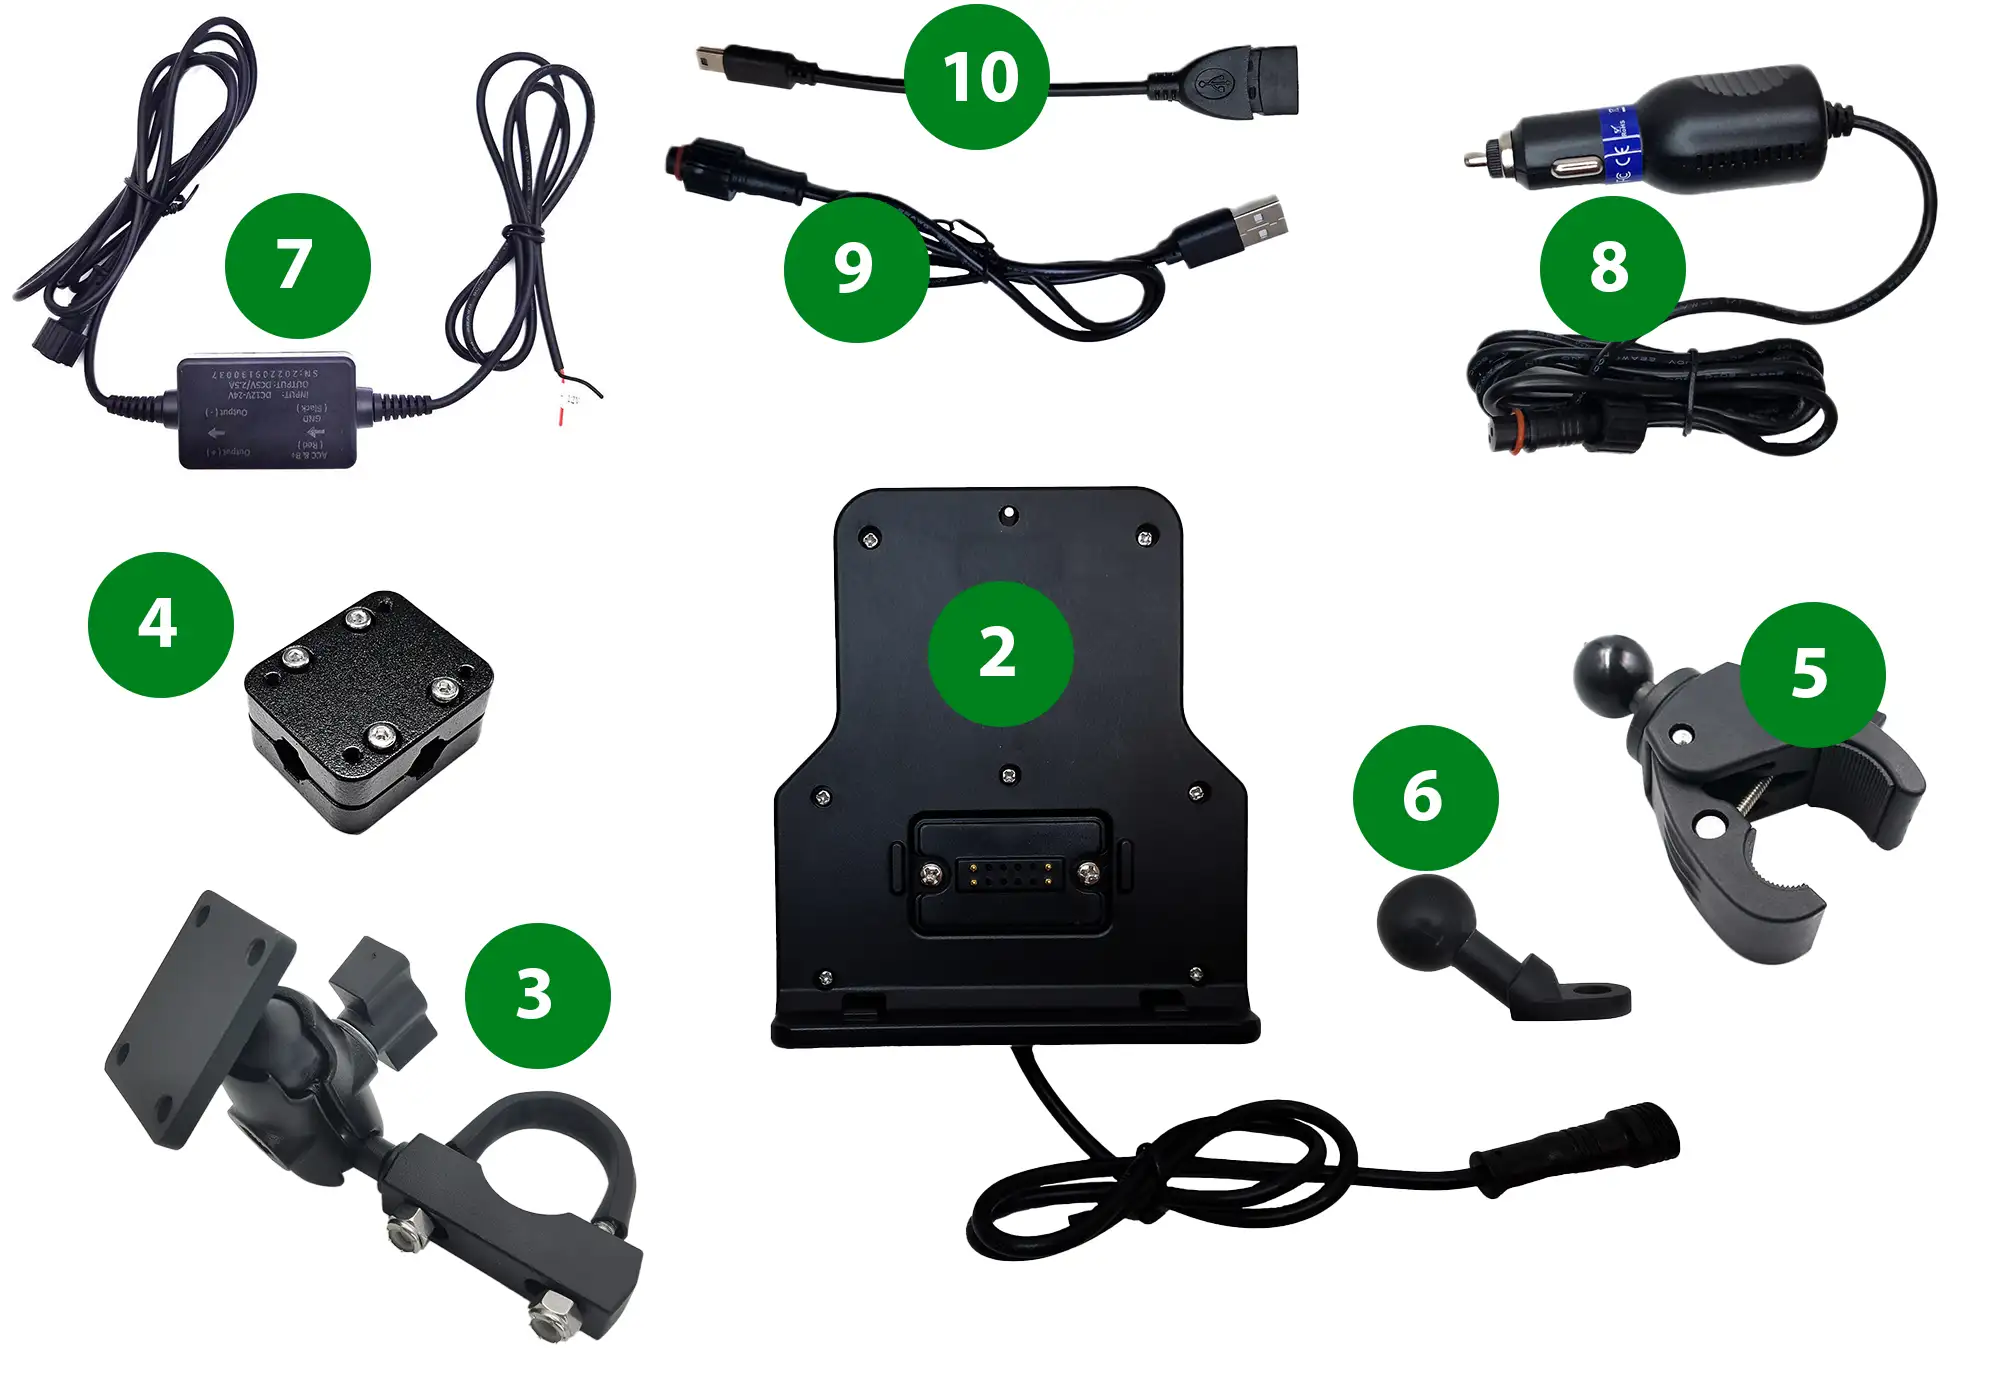
What's in the box?
*Not included in basic package |
|
 |
 |
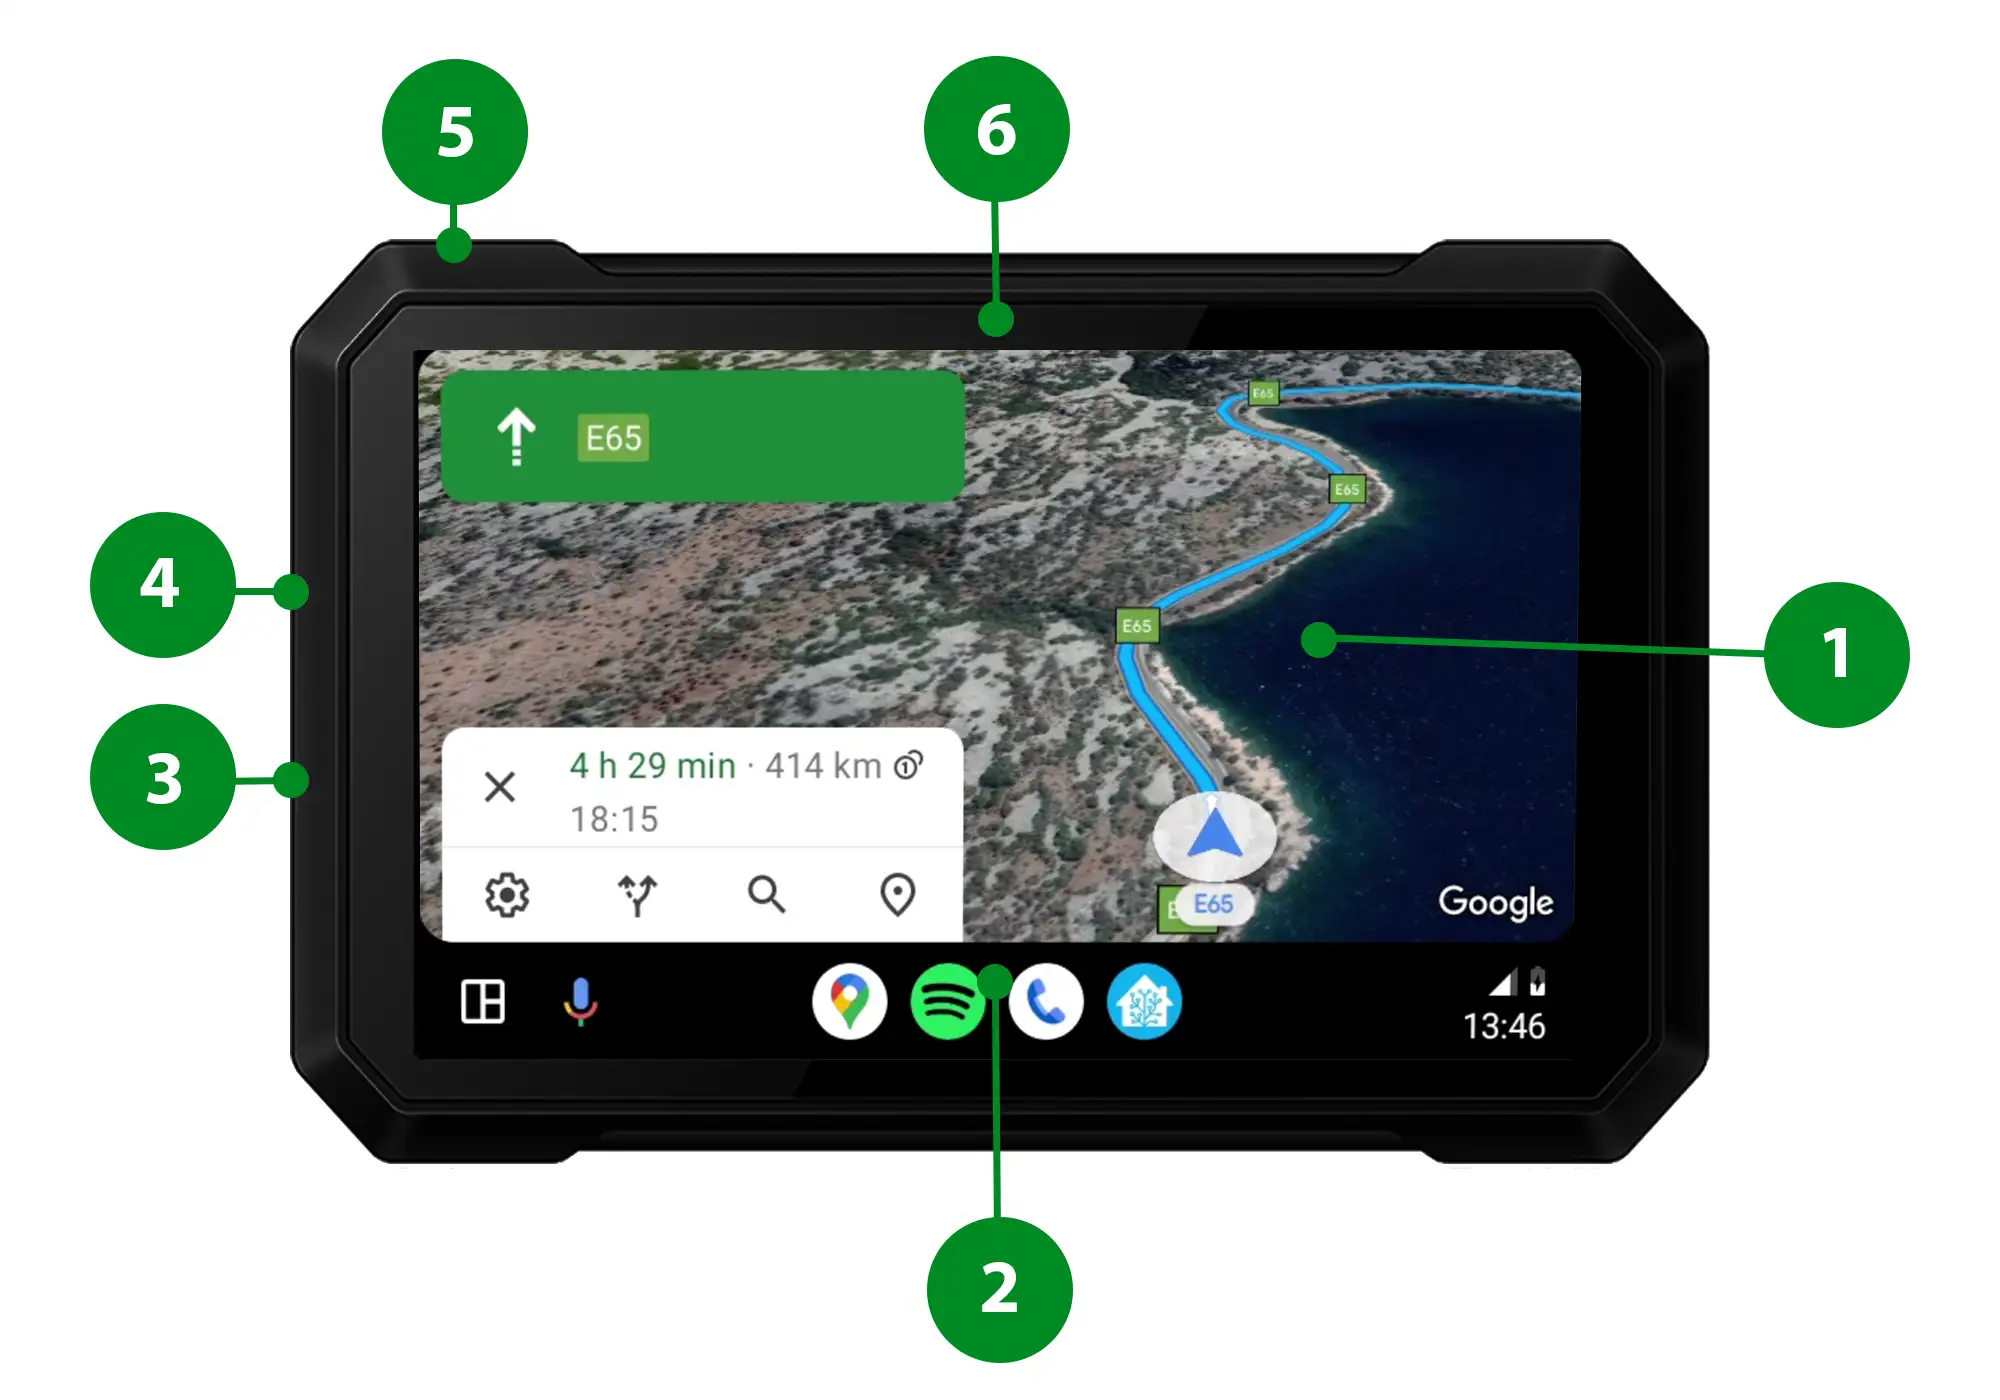
Device layout
FRONT: 1. LCD display 3. USB cable port 4. SD card slot 5. Power button BACK: 2. Charging port 6. Daylight/night mode sensor |
 |
|
Specifications
| Display | 7" TFT, high brightness |
| Screen brightness | 1000 nits (cd/m2) |
| Automatic daylight mode | Yes |
| Battery | No |
| Power supply | 5-12V |
| Touch screen gloves compatibility | Yes |
| Waterproof | IP65 |
| Temperature range | Operations: -20°C to 60°C Storage: -30°C to 80°C |
| Wireless module | Bluetooth 5.0 Dual Channels and Wifi direct |
| OS | Linux (Android Auto or Carplay) |
| Memory card | External MicroSD (max 64GB, not included) |
| RAM | DDR2 1GB |
| ROM | 2GB |
| Dimensions | 20 x 13 x 2.5cm |
| Unit weight | 370g |
| Warranty | 2 years |
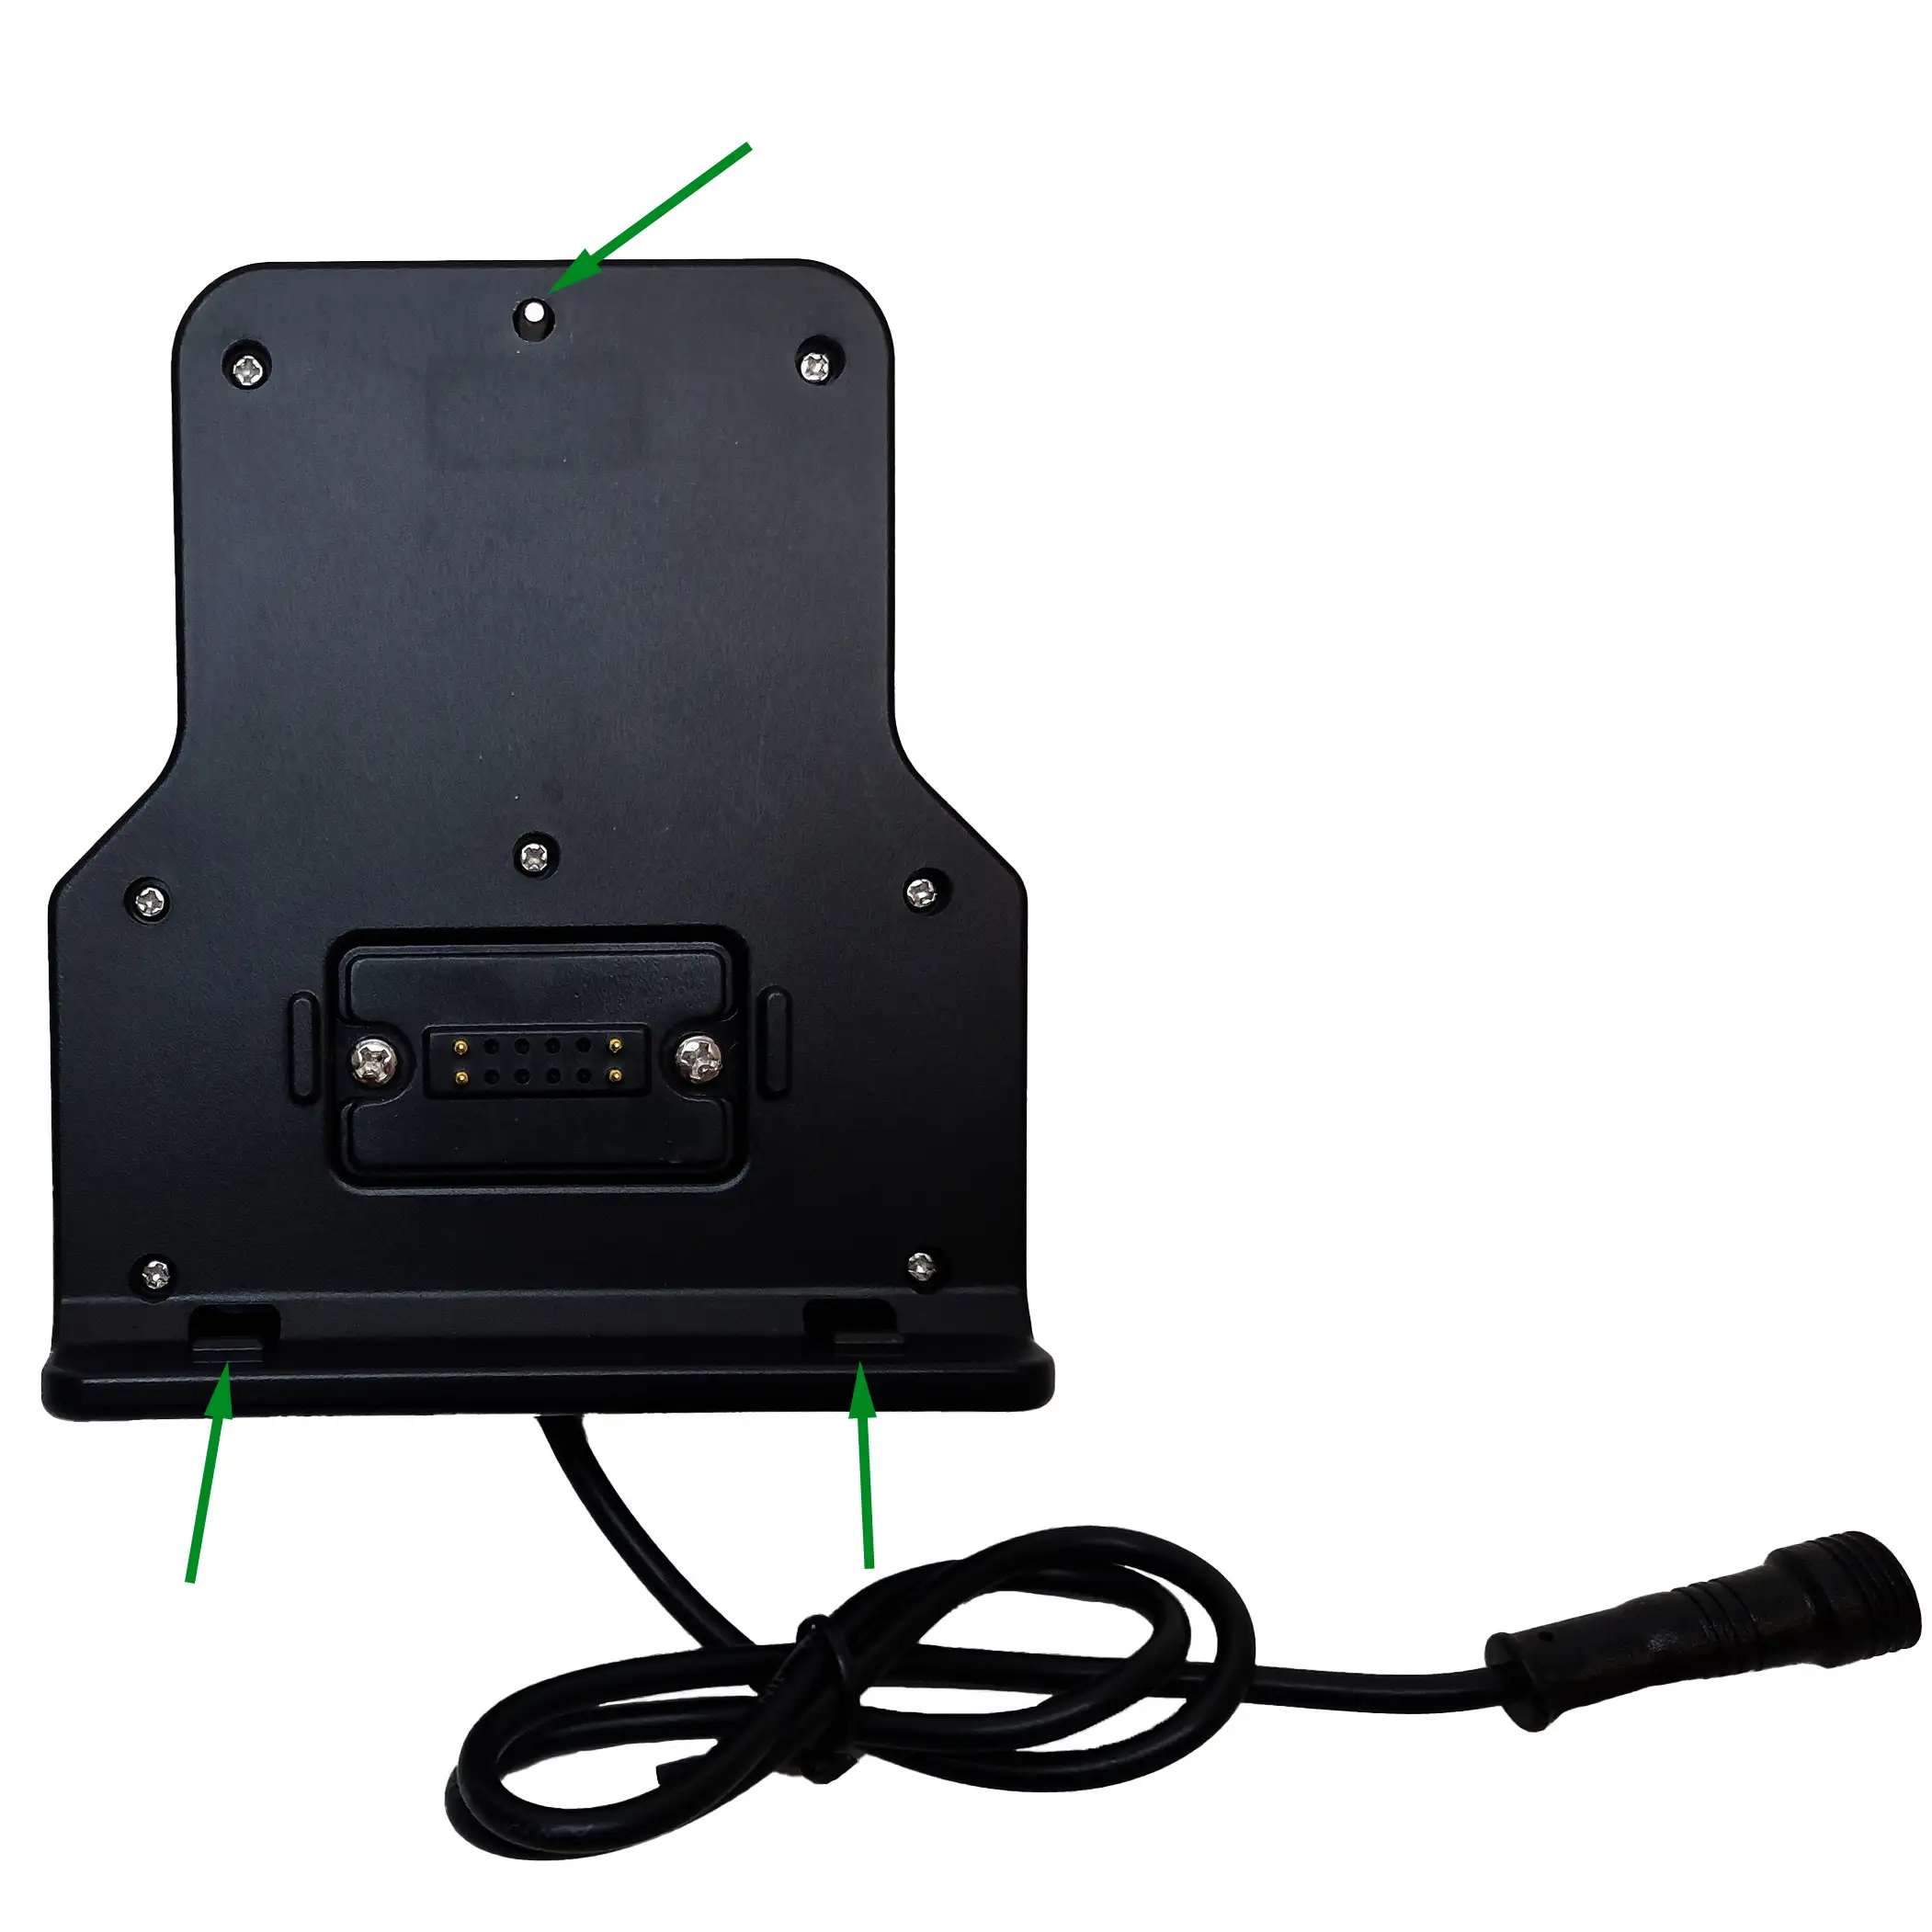
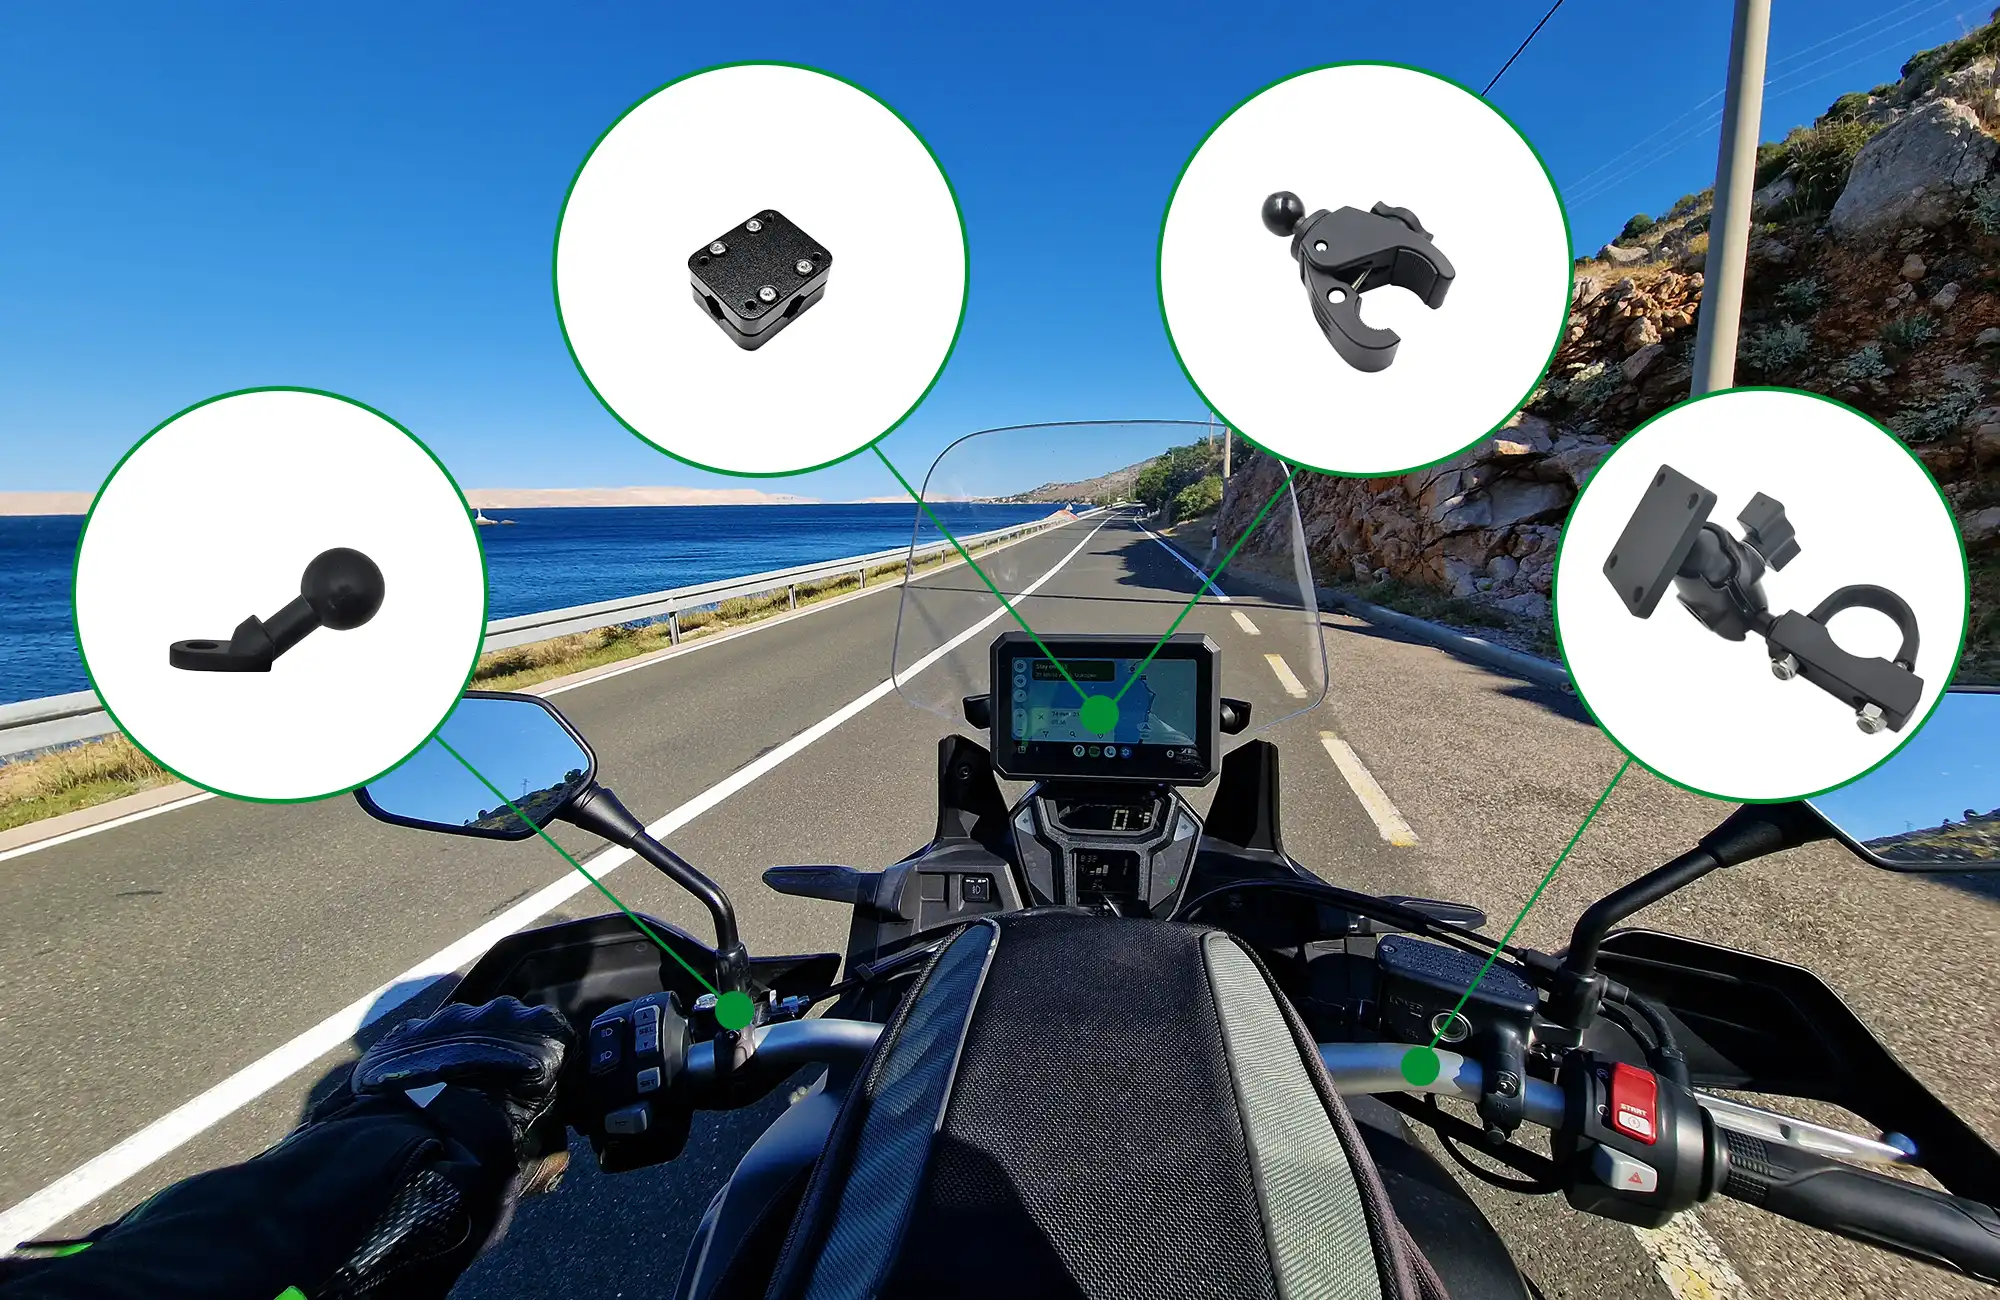
Mounting instructions
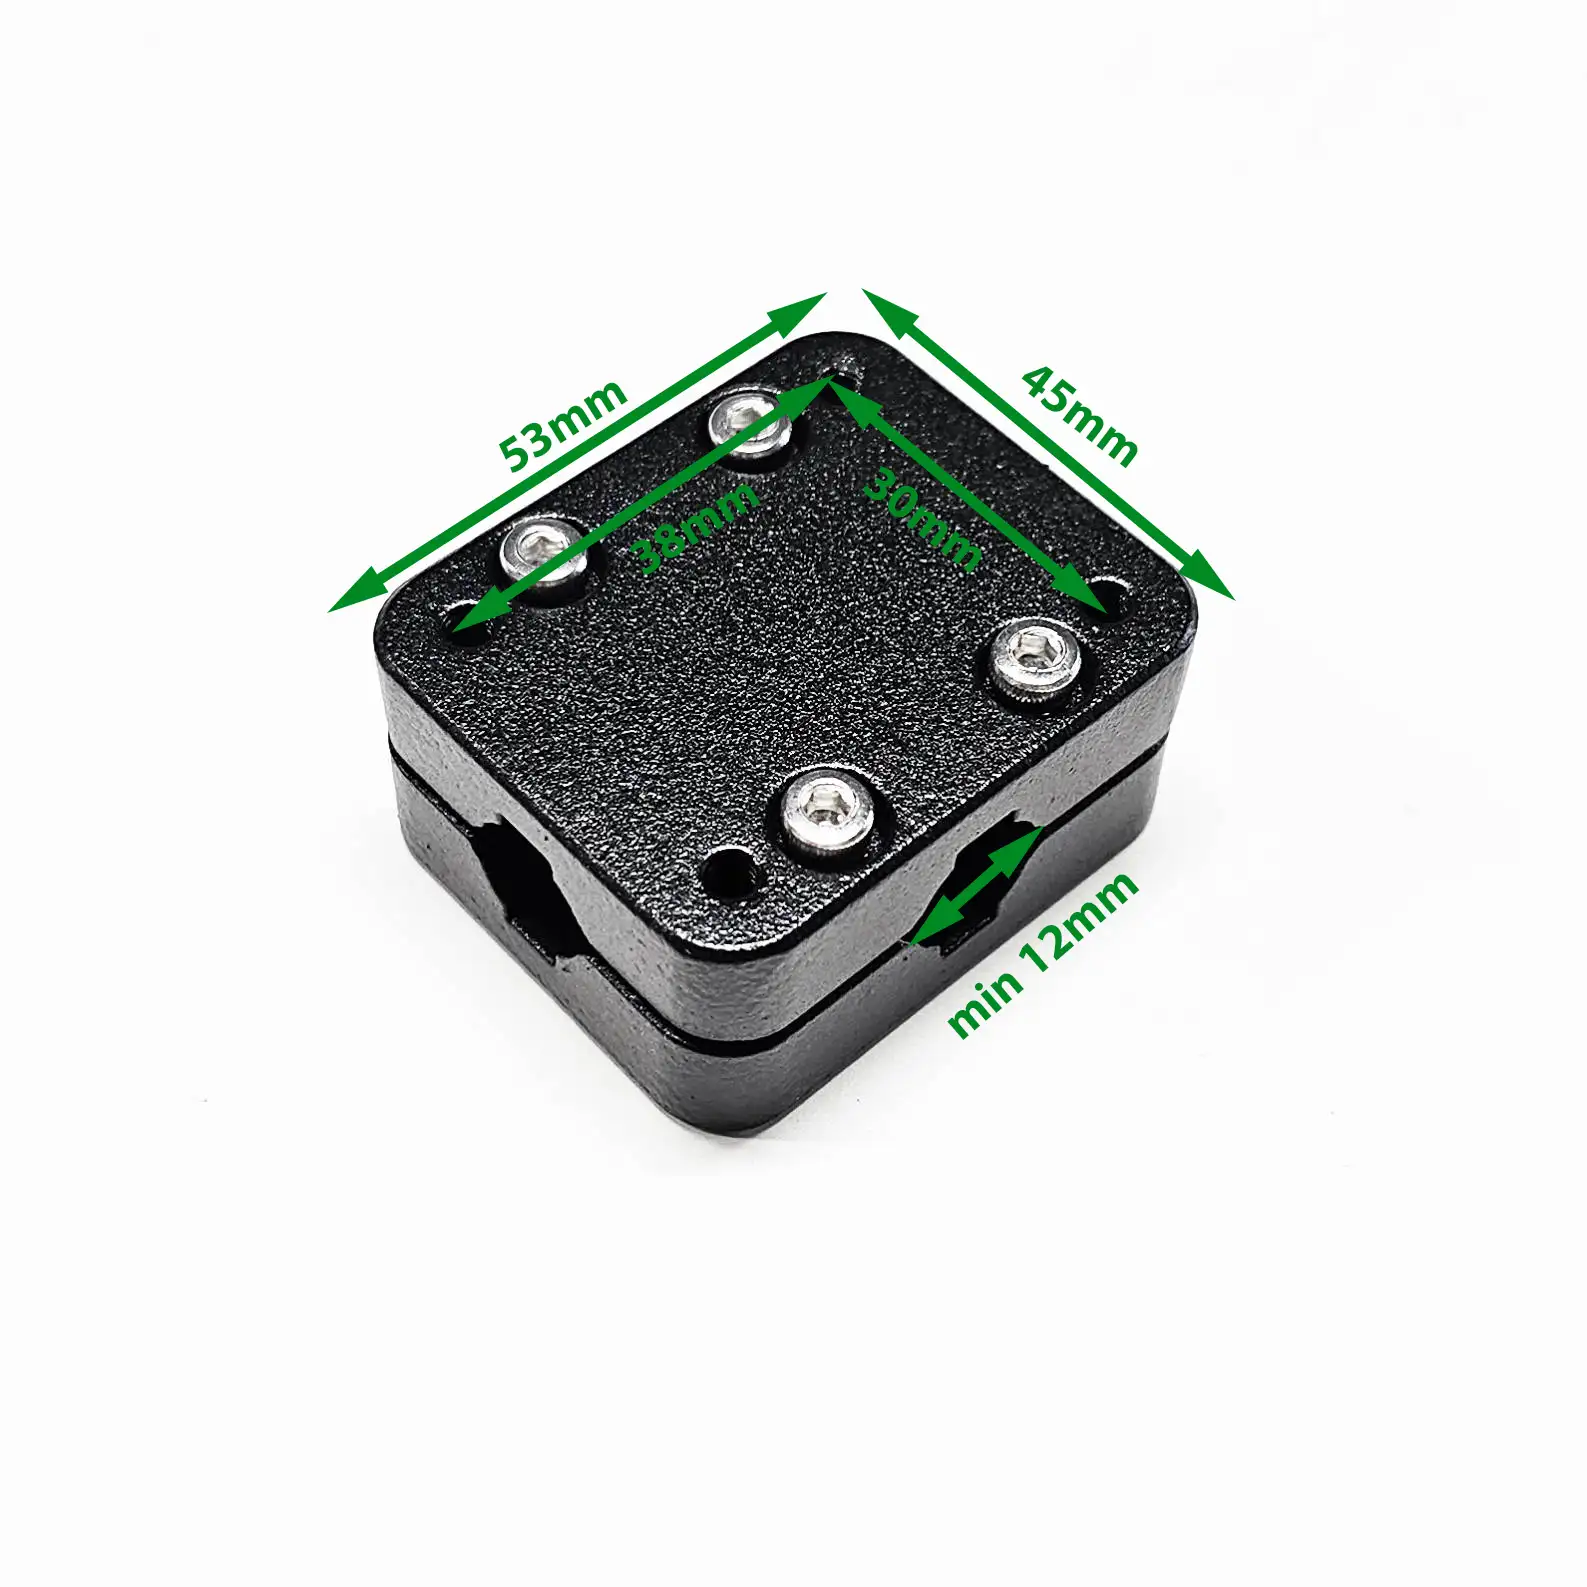
1. Install the bracket on N7 - pay attention the holes under N7 device, then fix the screw on the back of the bracket.
2. Choose one of the mounts and attach it to navigation bracket, then to the desired location on the motorcycle.
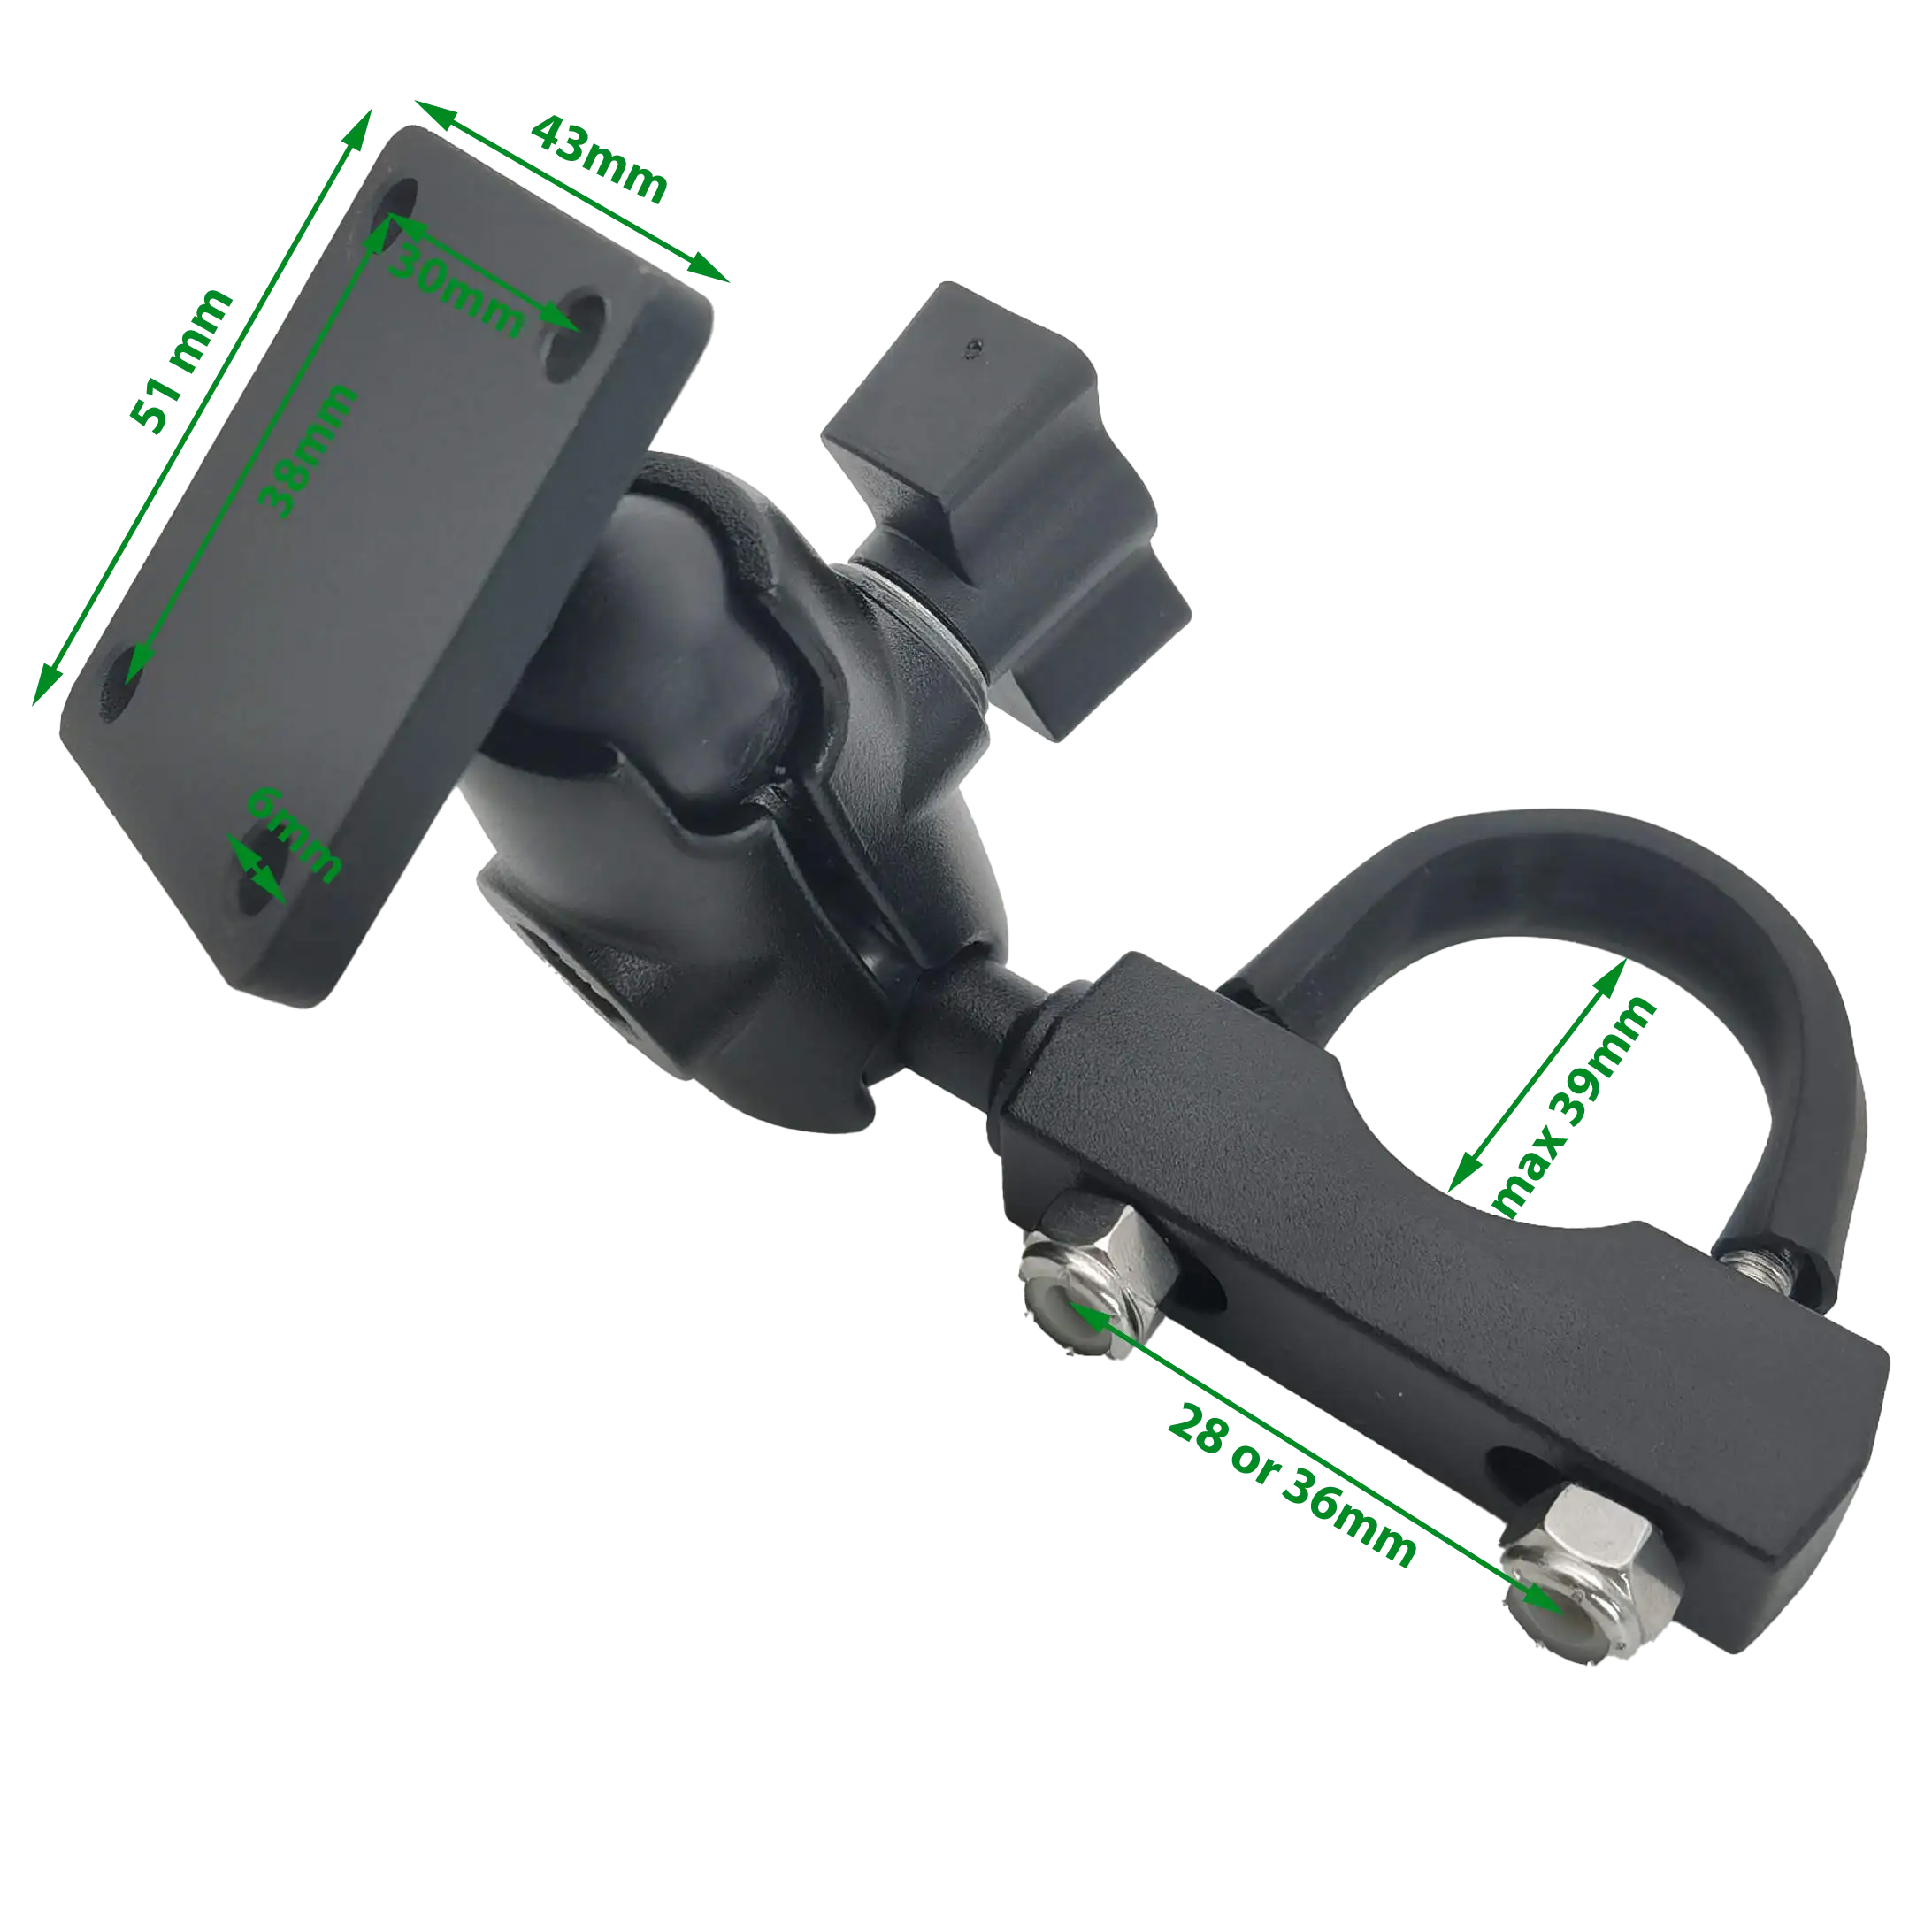
| Mounting kit for big pipes |
|
| Mounting kit for small pipes |
|
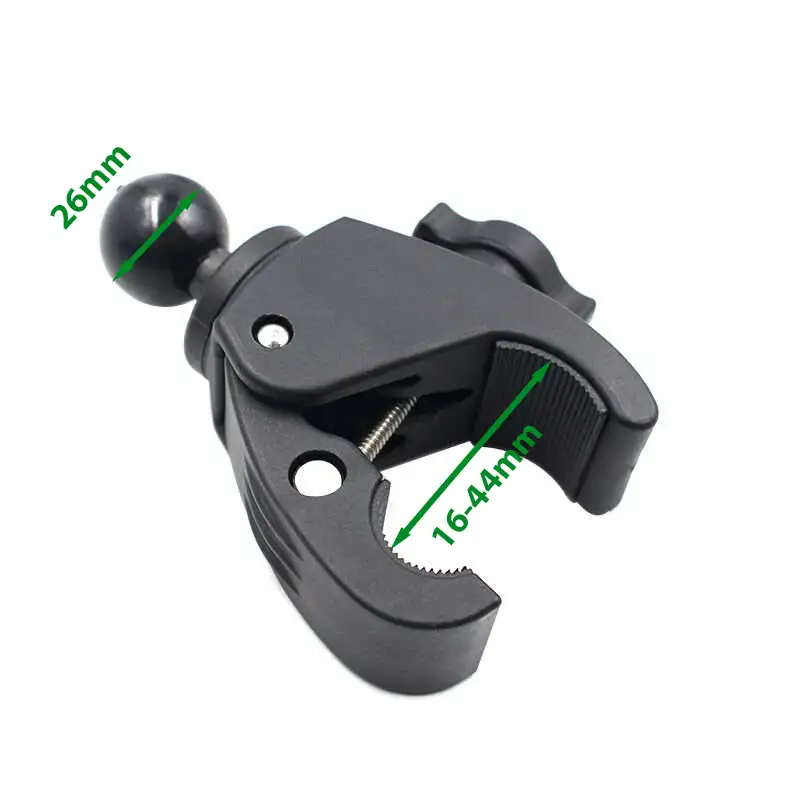
| Claw mount |
|
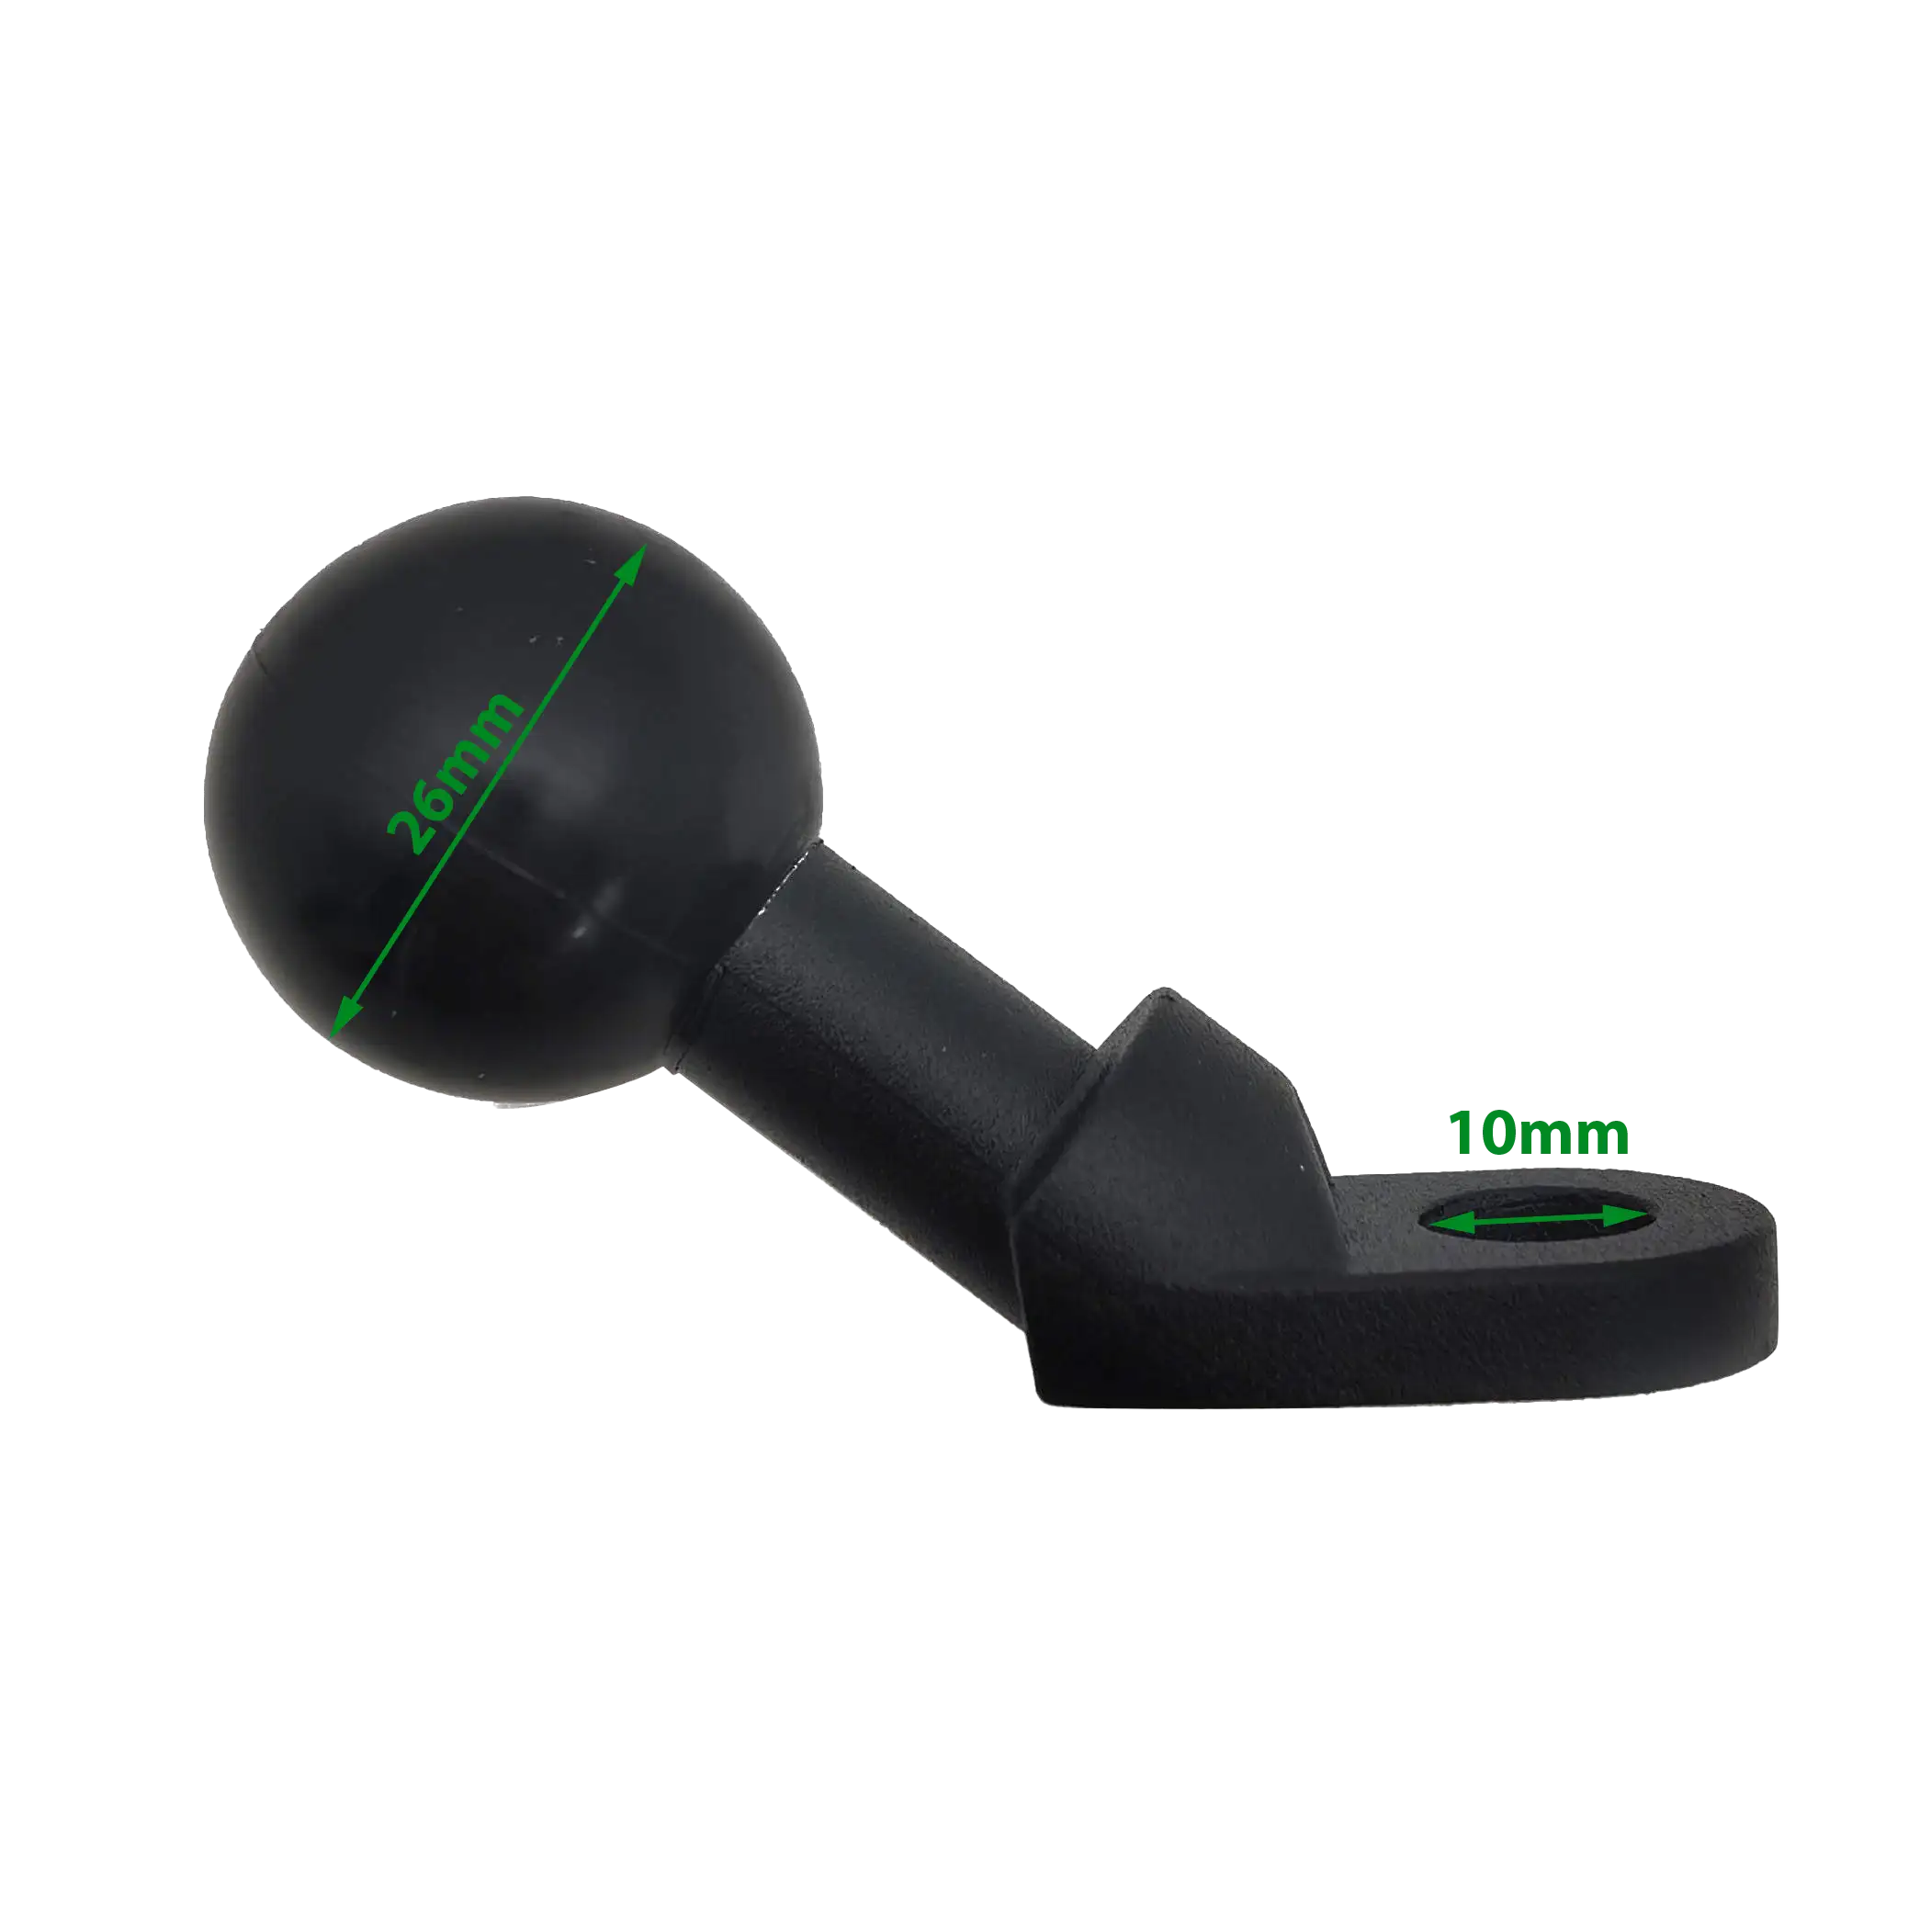
| Mirror mount |
|
Connection of the device to the power supply
Connect the device to the power supply of the motorcycle with one of the chargers below:
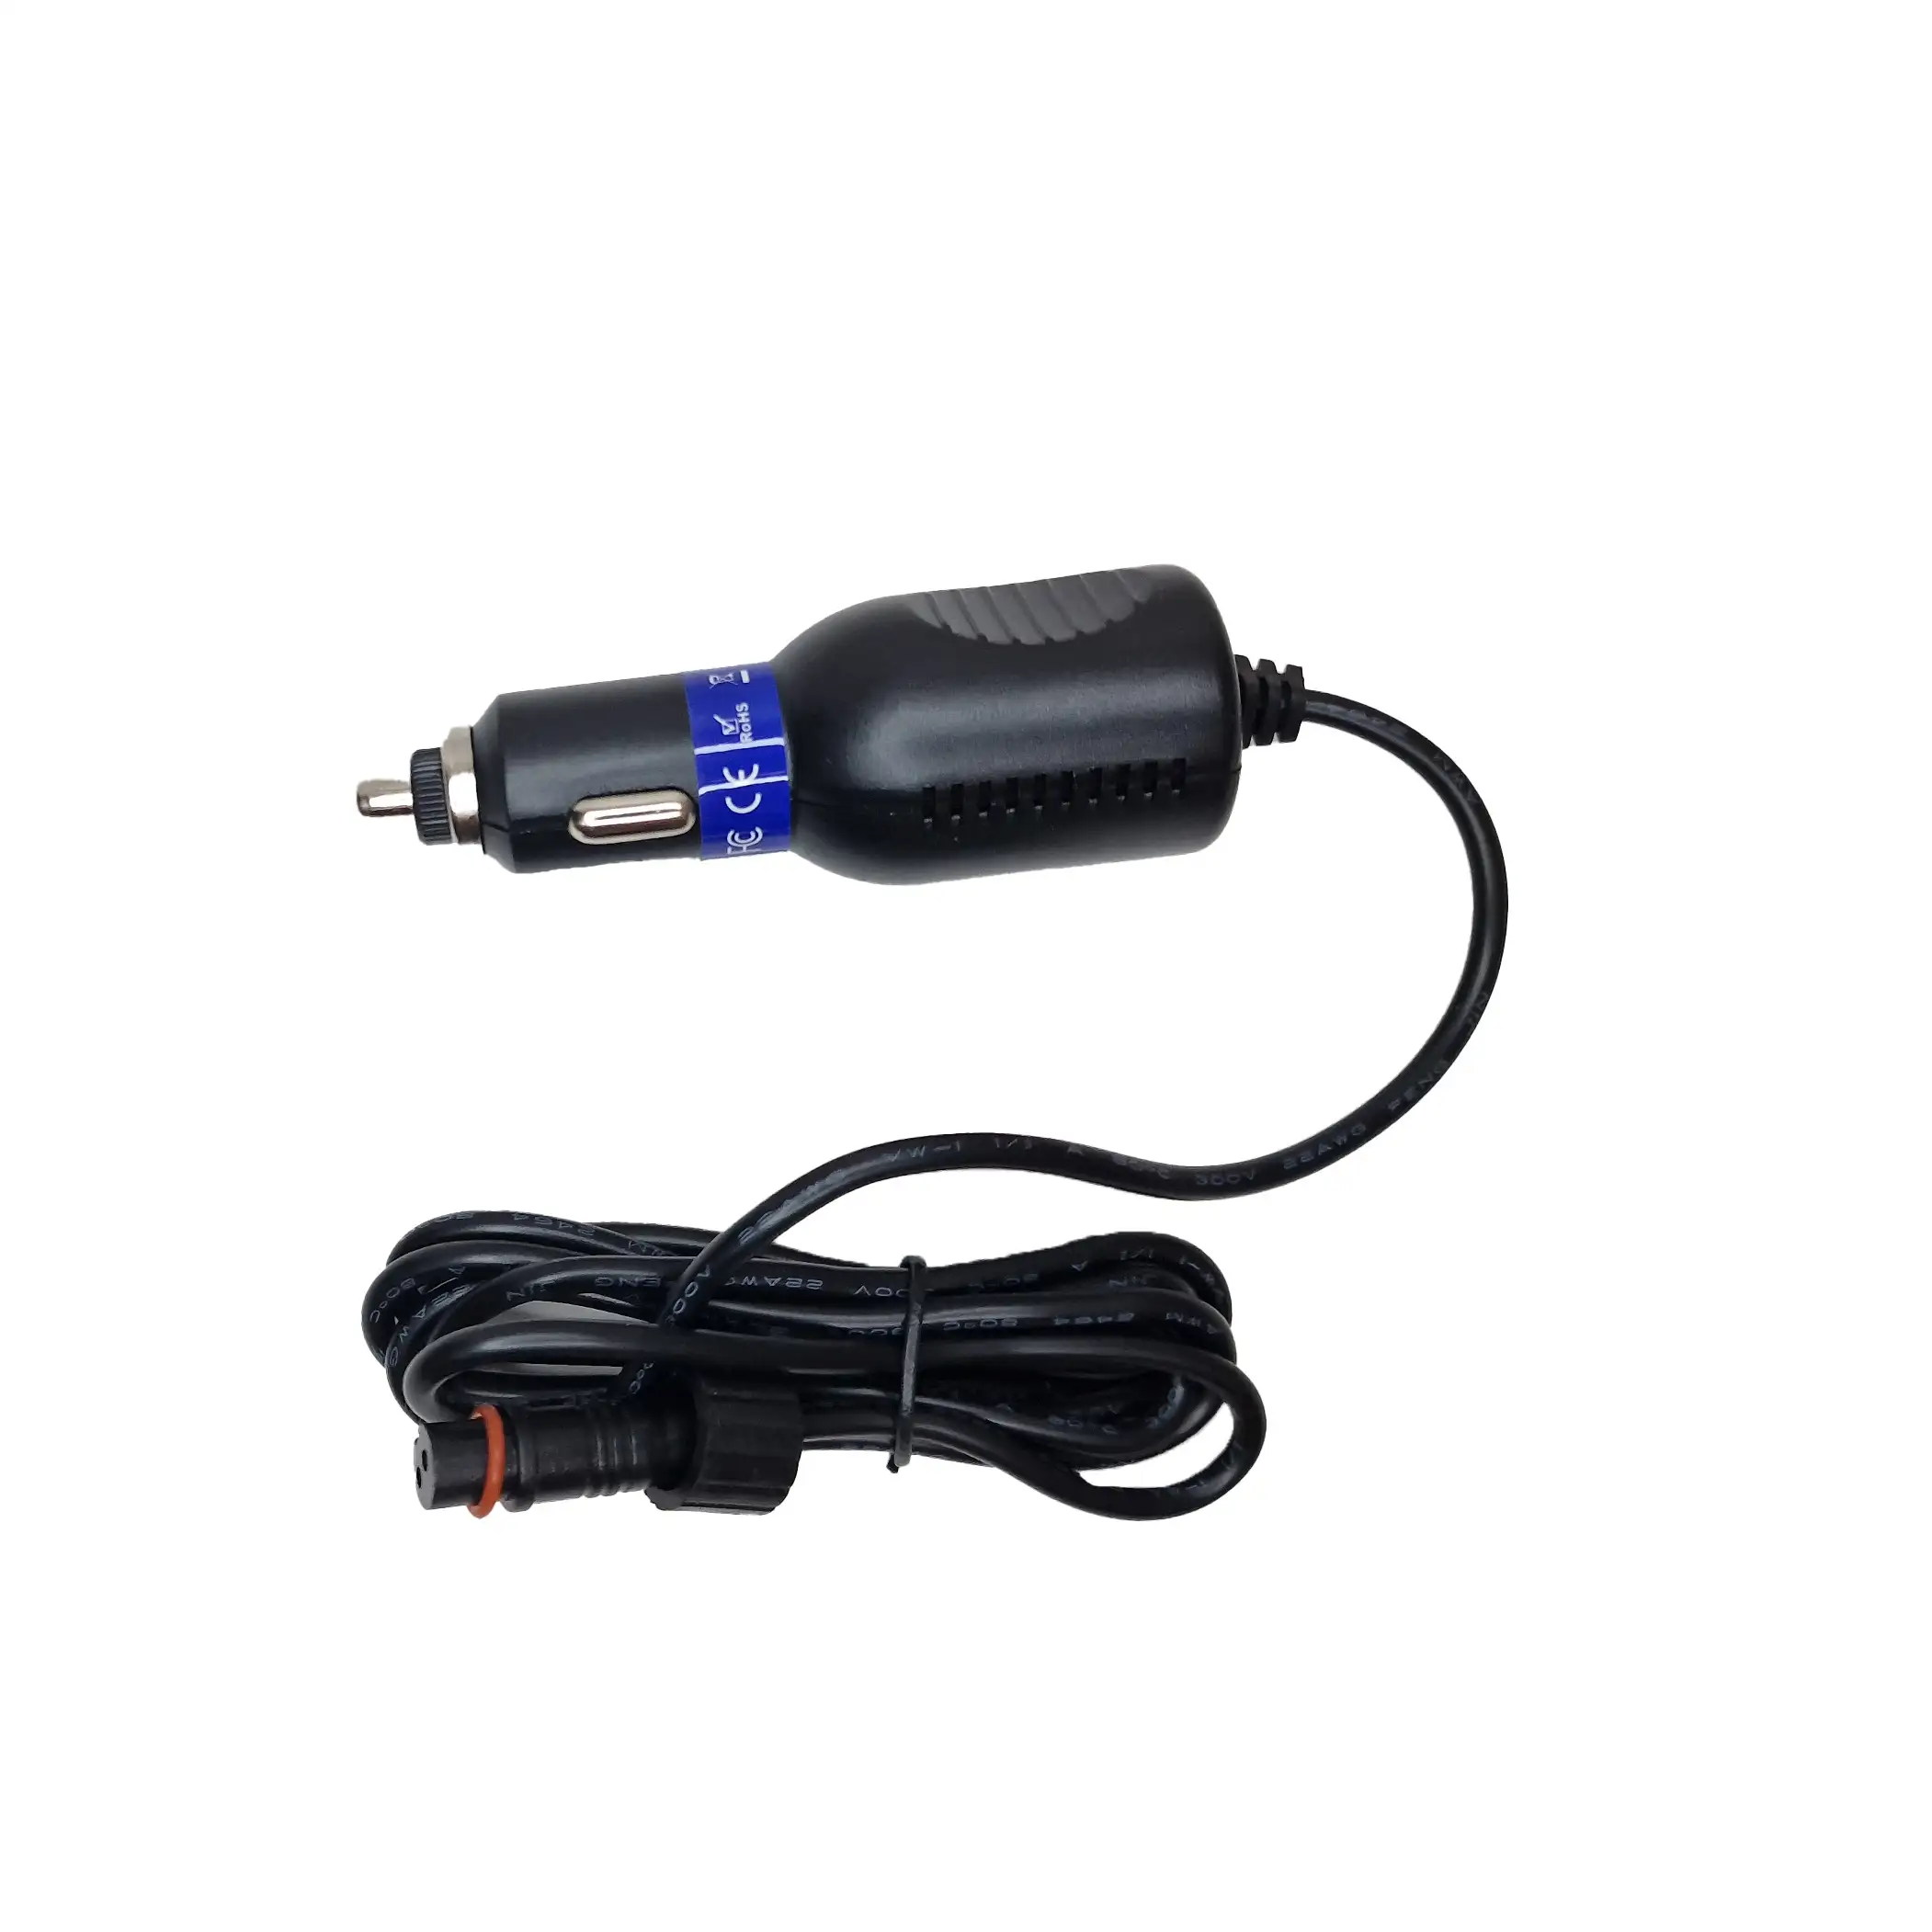
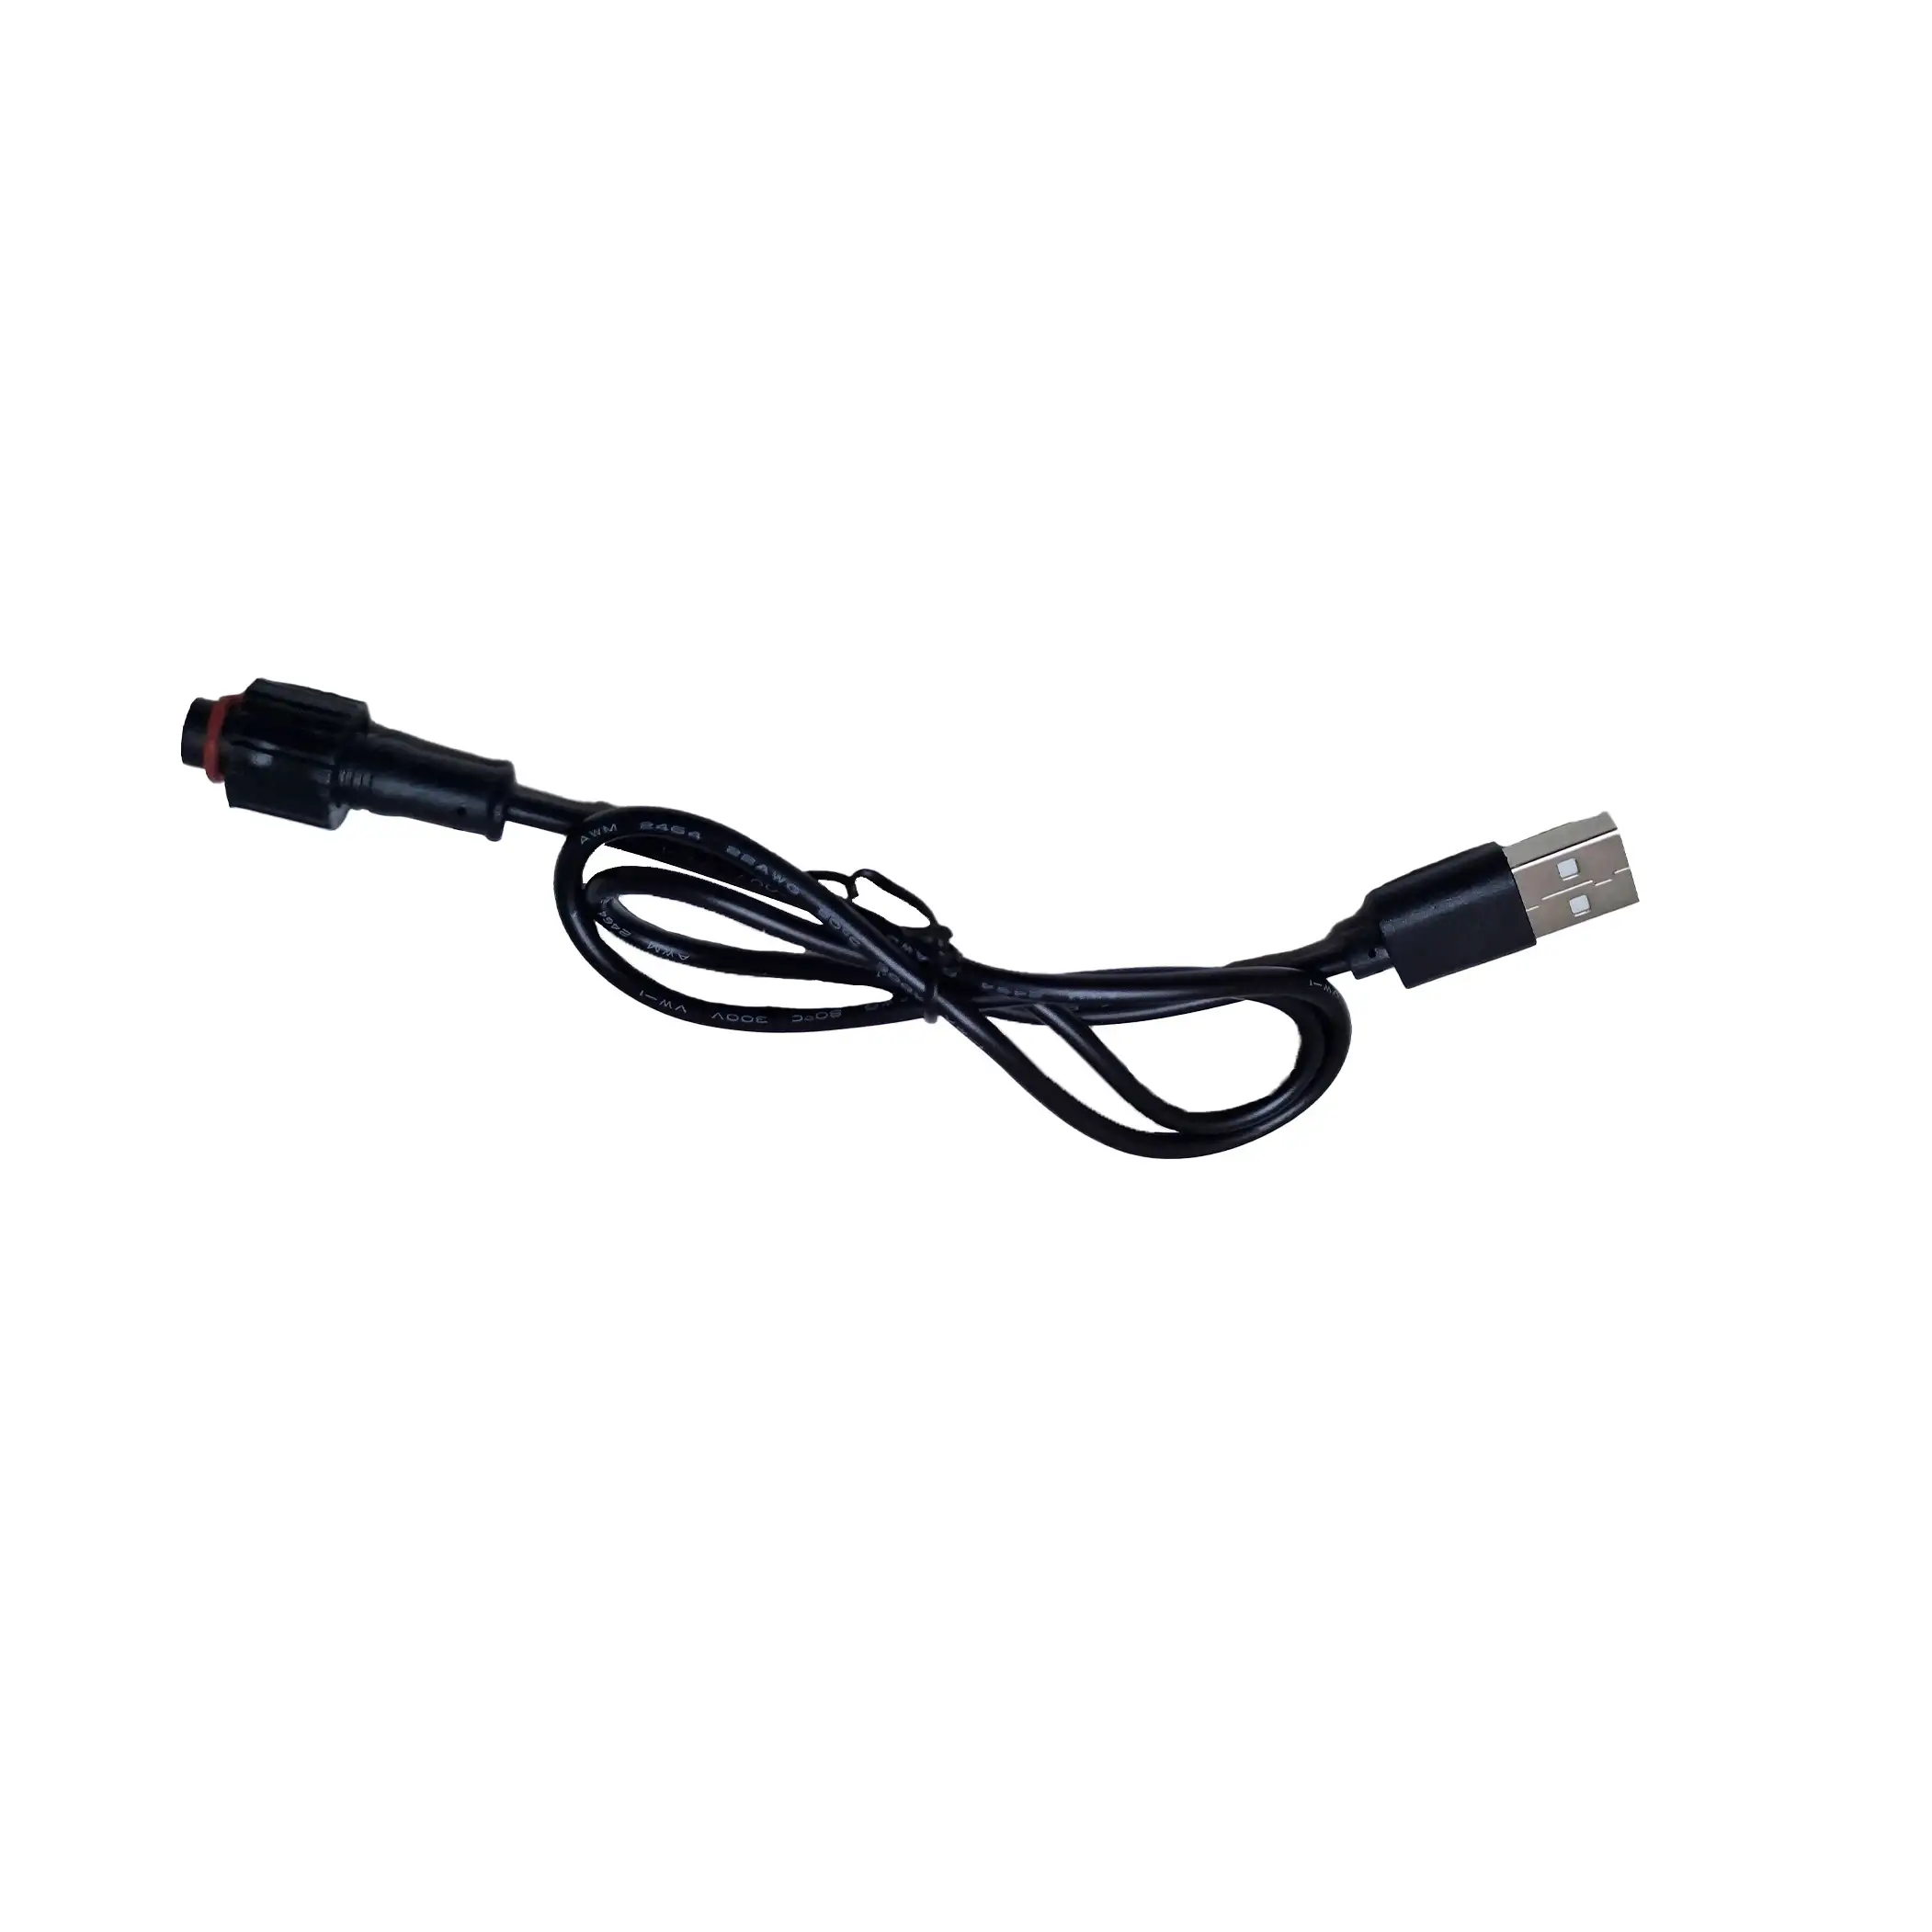
| 12V power supply | 12V socket plug cable | USB cable |
|
|
|
| Connect red line to ignition switch and black line to the negative pole. Connect the connector to the connector on the navigation bracket. | Put the plug into the 12V socket and connector to the connector on the navigation bracket. | Plug the USB to USB port and connector to the connector on the navigation bracket. |
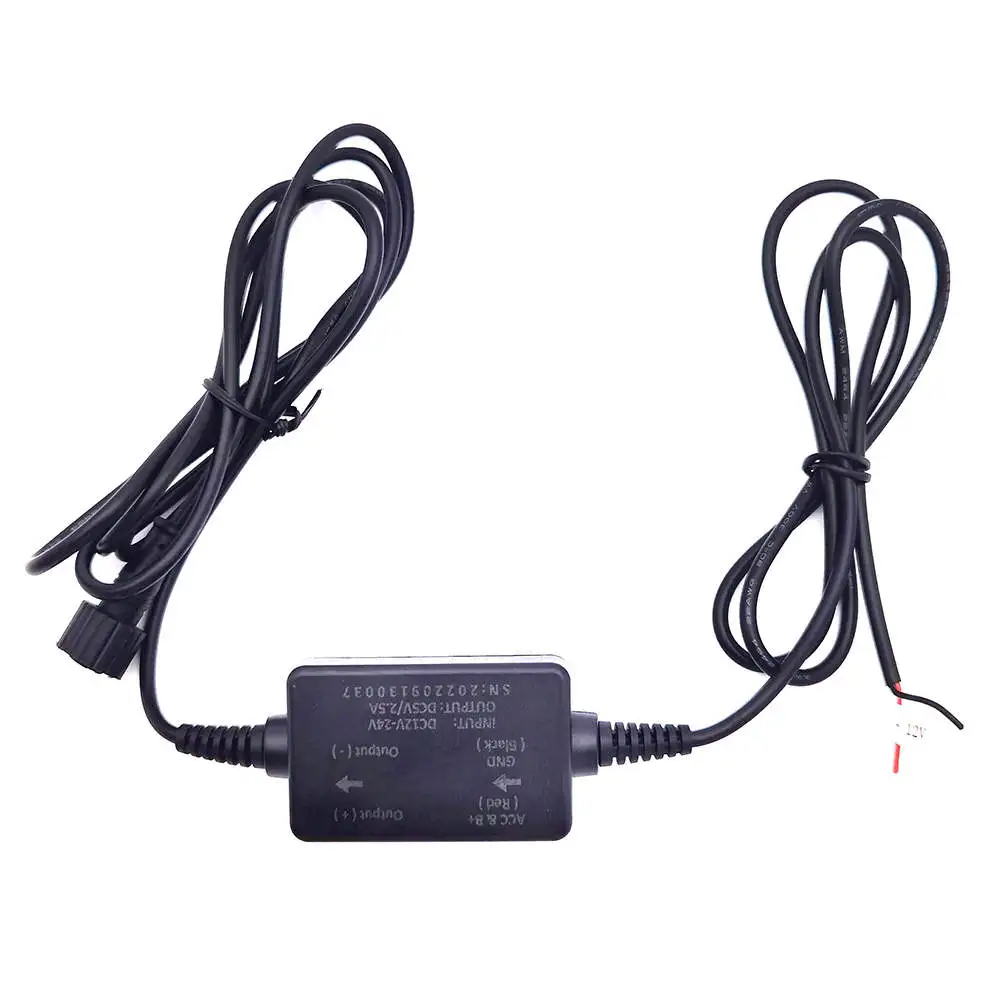
*When you turn on the motorcycle, the device will turn on automatically. Device doesn't have battery inside.
Power ON/OFF
1. Turn ON:
After you have connected the device to the power supply, it will start automatically, moreover you can turn it on by pressing button on the top left of the device (number 5 on "device layout").
2. Turn OFF:
The device will automatically turn off when the contact or power supply is disconnected, moreover you can turn it off by pressing button on the top left of the device.
Basic user interface
Top bar:
- Manual switch between day and night mode
- Quick volume adjustment
- Back button
Main buttons:
- CarPlay (wireless connection for iPhone mobile devices - more information in chapter "Android Auto or Carplay")
- Android Auto (wireless connection for Android mobile devices - more information in chapter "Android Auto or Carplay")
- BT Helmet (wireless connection with headset - to connect with a wireless headset, press BT Helmet button, then press "Bluetooth search" and search for your device. Click on it and connect to Navisyst navigation. In the phone settings, set priorities for playing music or calls (e.g. calls are made through the handset, music is played through the navigation, etc.)
- Settings (more detailed description in chapter Device Settings)
Auxiliary buttons:
- Memory (for the purpose of viewing images or movies from the SD card)
- AirPlay (wireless "streaming" connection for iOS devices)
- Date and time
DEVICE SETTINGS
In the main menu, press the Settings button.
System:
- Wallpaper (selection of background
- Language (language selection)
- Date time (time settings)
- Update: to update the device, you need a system image file (only available from the software provider). Upgrade system: system update. Upgrade MCU: firmware update for the processor.
- Device MIC (Turn ON/OFF the microphone on the device)
- System version
- SDK version
- MCU version (firmware version for the processor)
- GPL version
Wifi:
The device uses Wifi and Bluetooth for data transfer (Bluetooth and Wifi must always be enabled on your mobile phone)
- Wifi (vklop/izklop Wifi)
- Name (ime Wifi povezave)
- Password (geslo)
Bluetooth:
Naprava za prenos podatkov uporablja Wifi in Bluetooth (na vašem mobilnem telefonu mora biti Bluetooth in Wifi povezava vedno vključena)
- Visibility (turn Bluetooth visibility on/off)
- Name (Bluetooth device name)
- Address (MAC address)
- Paired (list of paired devices)
- Discover (search for new devices)
Display:
- Display settings: Brightness, Contrast, Chromaticity, Saturation, Reset
- Backlight level (Day) - brightness in day mode
- Backlight level (Night) - brightness in night mode
Sound effect:
- Volume (volume settings of individual functions/systems): Master volume (general volume), Navigation volume, Carplay Media volume (media playback volume in the Carplay system), Carplay Telephone volume (call volume in the Carplay system), Android Auto volume
- EQ (sound frequency equalization) - certain frequencies can be changed manually, or you can choose one of the predefined profiles: Standard, Classic, Rock, Jazz, Electric, Pop, Soft
- Loudness (general volume increasment)
Factory:
The settings are locked with a password and are intended for service and should be performed by an authorized service technician.
Android Auto or Carplay
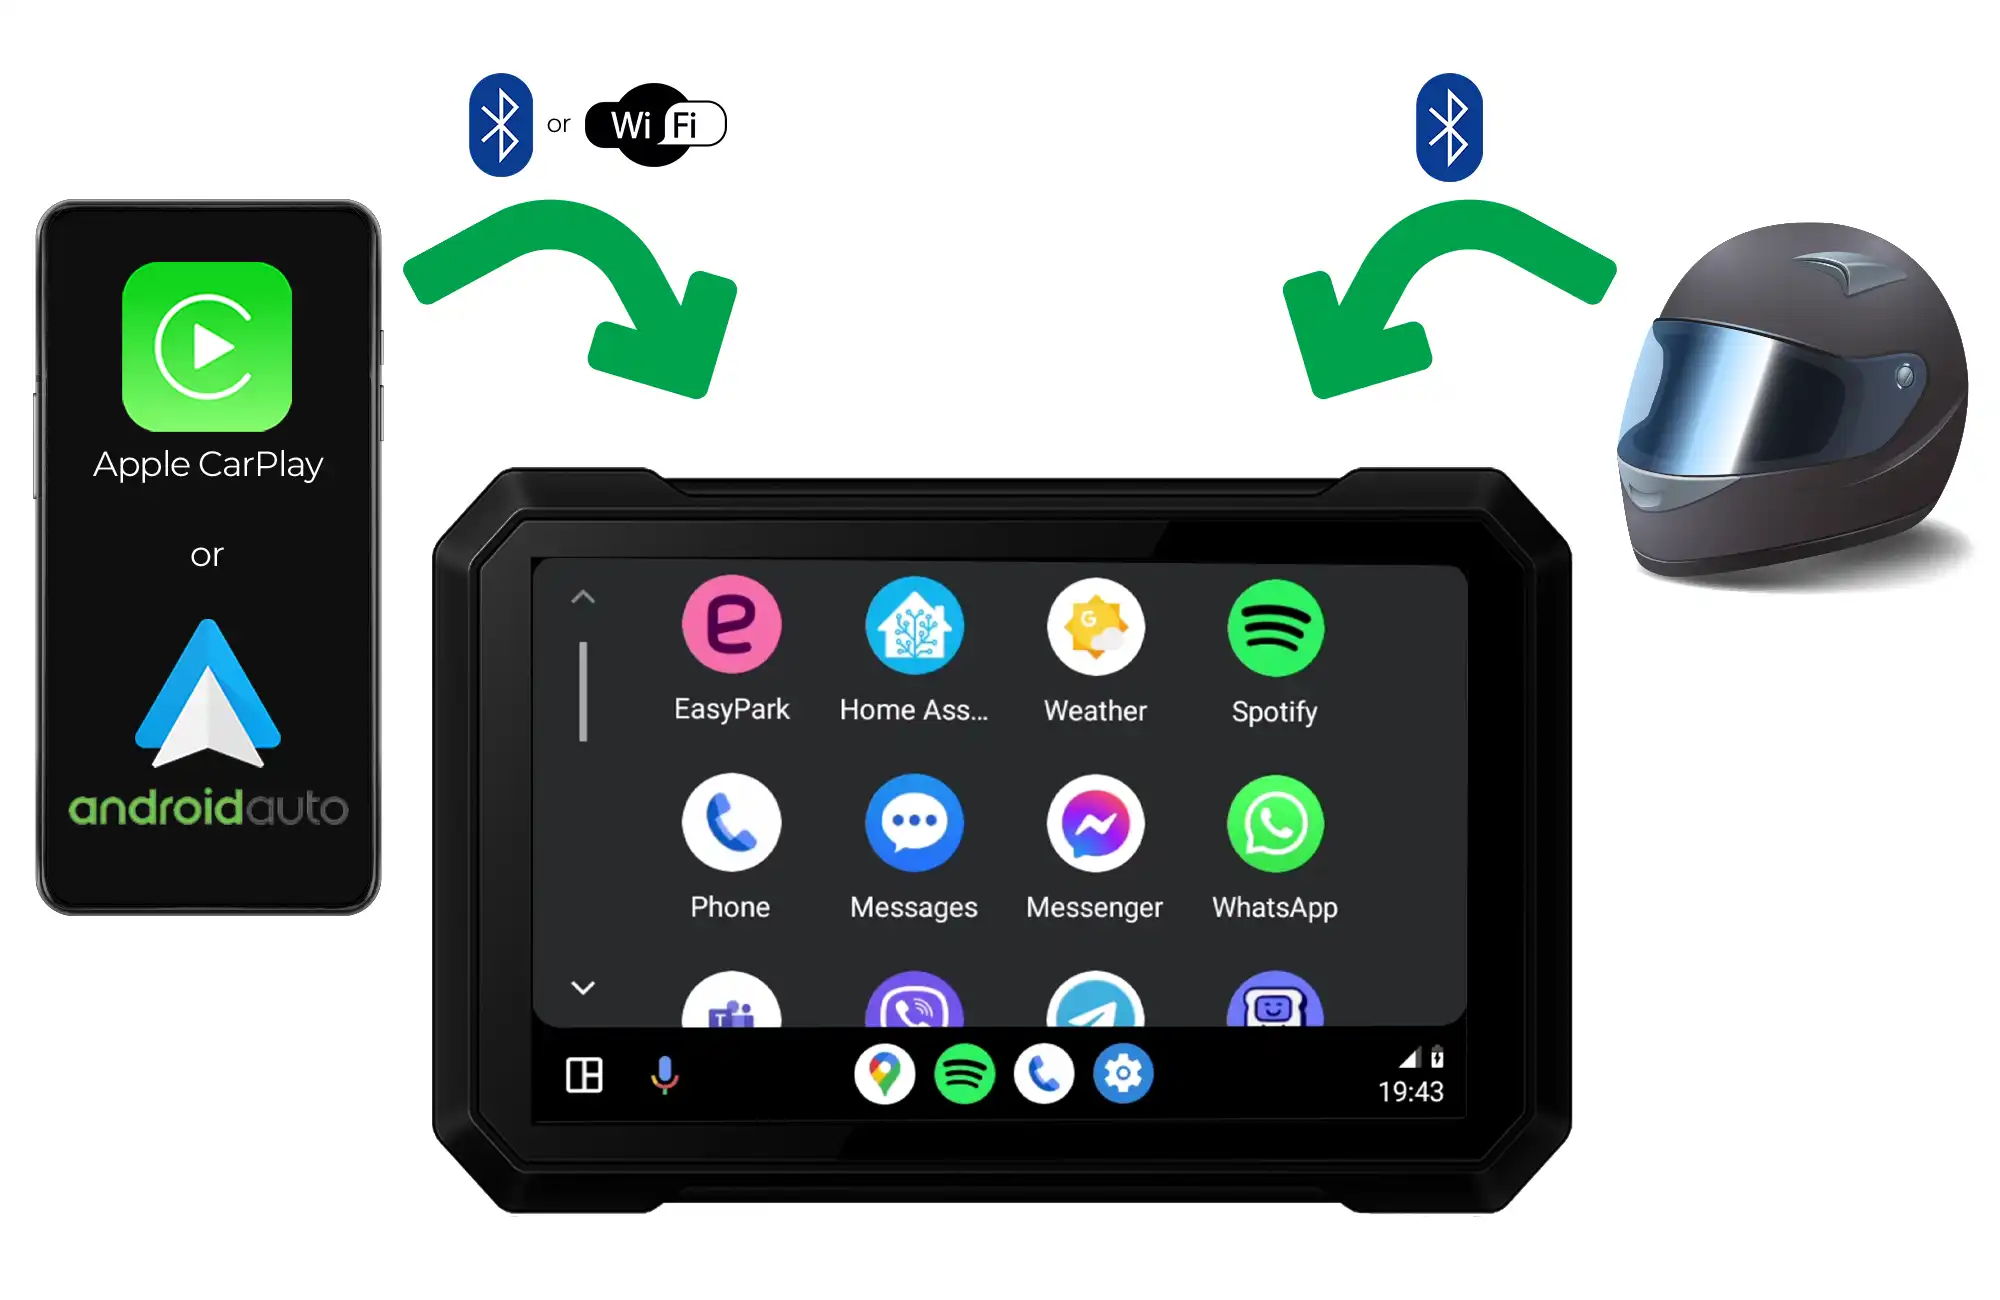
In the main menu, press the button Android Auto (for Android mobile devices) or Carplay (for Apple iPhones). The procedure in this chapter needs to be done only for the first time, after that device will be connected automatically.
Apple CarPlay:
To connect via Bluetooth, please use "search for other devices" on your mobile phone. The Bluetooth connection device name is "Car****". Click on it and follow the instructions to connect on your mobile device. After successful pairing, the Carplay system will start automatically.
Android Auto:
To connect via Bluetooth, please use "search for other devices" on your mobile phone. The Bluetooth connection device name is "Car****". Click on it and follow the instructions to connect on your mobile device. After successful pairing, the Carplay system will start automatically.
Tips: Bluetooth and Wi-Fi must be always on.